Tuesday 27 February 2018

Merino Stripey Blanket

After all the knitting I've been doing for the past 2 months with my Tail of Two Dragons Scarf, I needed to do some crochet for a change! Whilst I want to design a crochet version of my scarf, I decided to make a start on my merino blanket first.
I've been collecting pure merino wool from the january sale at my local yarn store and have been debating long and hard what design to go for. Would it be circles within squares, or hexagons, flower shapes, mandalas?? My problem is that by buying in the sale, I have a fixed amount of each colour available to use. If I run out, there's always the chance I won't even be able to find it online...
So I decided the safest option would be to make another stripey blanket using my tooty stripey pattern (see the tab at the top of the page for the link to the free p*a*t*t*e*r*n.

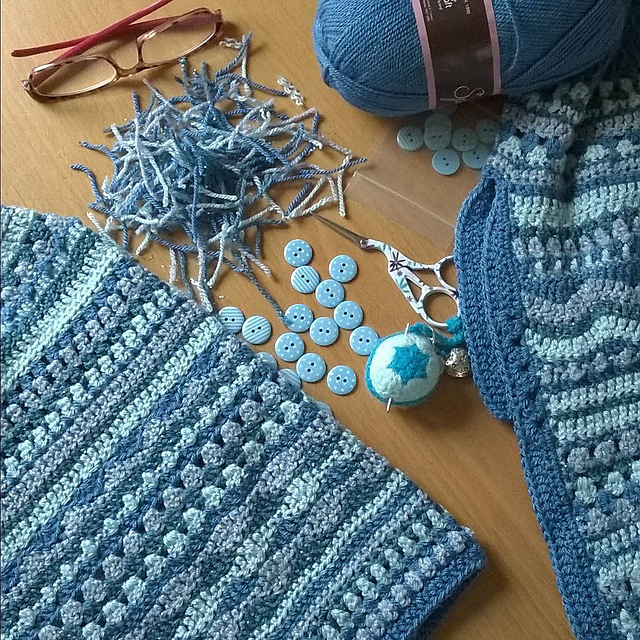
I couldn't resist a little photo shoot as I prepared some bobbins to help me arrange the colours into order. There's no random choosing of colours here - I've calculated exactly how much I have of each colour as a percentage of the total, and therefore, how many rows of each colour within a 20 row colour repeat. I may have to do a small amount of swapping as I work the texture pattern as some rows are very short and use little yarn and others are great big tall fat ones and use loads! I don't want to find I use all the colour I have least of very quickly. And I've kept back two balls for the border. Want to see?? 

Tina's Allsorts, Merino Stripey Blanket

Tina's Allsorts, Merino Stripey Blanket

Tina's Allsorts, Merino Stripey Blanket

Tina's Allsorts, Merino Stripey Blanket

Tina's Allsorts, Merino Stripey Blanket

Tina's Allsorts, Merino Stripey Blanket

I'm very pleased with how the colours are working together - considering I had to make do with mixing three different brands and what they had left!! It's coming on at a cracking pace at the moment and I've done more than 20 rows already.
The yarn is just beautiful to work with too - I won't want to work with acrylic ever again. But I don't think I can afford not to either!!

On another note, would you like to see the pic of Mara receiving the project bag I made her?? Isn't she beautiful??


And on a completely random note, here's Fluffy doing his favourite thing - sleeping!!


That's all for today I'm afraid - hopefully see you again soon!   T  xXx

Friday 23 February 2018

Tail of Two Dragons Scarf goes live!!!

Woo Hoo!!! It's live!! My test knitters seem to be happy so I decided to go ahead and publish my Tail of Two Dragons Scarf p-a-t-t-e-r-n!!

I set the price very low at a fraction over £2 but Ravelry then add on 20% VAT, bless them... so it's come out at £2.50 which is still a very good price when you compare it to a lot of other down-loadable p-a-t-t-e-r-n-s on Ravelry - some are over £6!!  (Forgive the dashes in that word - I'm trying to dodge the robots!!) And you shouldn't need a Ravelry account to buy it either.

Click here to take a look and
BUY NOW

Tina's Allsorts, Tail of Two Dragons Scarf

I will probably add it to Etsy as well, as you can download directly from their site I think but you can't with Folksy, so I'll skip them.

And please, if you do decide to buy it, take the time to let me know what you think. This is my first paid publication and I'd really appreciate some feedback - and if you are a Ravelry member, link your own project page so we can all see what you made!

Thank you!!  ๐Ÿ˜‰๐Ÿ˜‰๐Ÿ˜‰๐Ÿ˜˜

Sunday 18 February 2018

Coats, scarves - and spoons!!

Ta - dah!!! Here are Lucy and Zoe modelling their new dog coats and they look like they're a good fit too - thank goodness! I was a bit worried that they wouldn't fit very well at all. So hard to make something based on just 3 measurements and no possibility of a fitting. But they're fine.
It sounds like they might take a bit of getting used to though, as the girls were acting goofy" when they first had them on but that's to be expected really.

Tina's Allsorts, Well dressed dog coats

Tina's Allsorts, Well dressed dog coats

So after the success of the dog coats, I got back to work with my Tail of Two Dragons Scarf. The pattern is currently undergoing testing and one lady is even making one in 4 ply sock yarn - I think that might take her a while to finish....

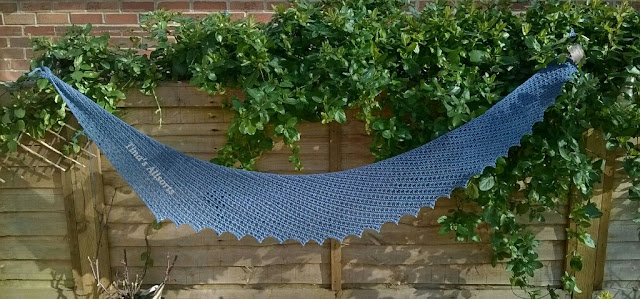
Here's my third scarf - made in merino DK again, this time a solid denim blue requested by a friend for her Mum's birthday. I was very happy with how it turned out - the solid colour really shows off the texture pattern nicely and the merino yarn gives it a delicious squishiness!

Tina's Allsorts, Tail of Two Dragons Scarf

When I took this next pic I included an orange spoon. A simple plastic spoon that I remember very clearly from childhood picnics and it still looks brand new - it's even shiny! 50 years on and still going strong (the spoon, not me!). To be fair, it has been kept out of sunlight which would probably have faded the brilliant orange colour and perhaps made it brittle but it's still in use to this day. It will probably outlast me - makes you really think every time you take plastic wrapping off something and just throw it away...

Tina's Allsorts, Tail of Two Dragons Scarf

Tina's Allsorts, Tail of Two Dragons Scarf

Tina's Allsorts, Tail of Two Dragons Scarf

I was aiming for "coiled dragon" with this last pic but I think I might have been closer to "spiny frog"!!! And here's Fluffy, helping me out with his own version of pattern testing. I think he was testing the "squishiness" of the texture pattern!!

Tina's Allsorts, Tail of Two Dragons Scarf

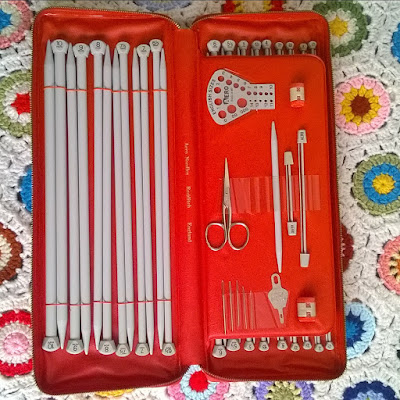
While making my 3 different scarves, I've been using a variety of different length needles as each one grew. Starting with little 8" children's needles then moving onto these -

Tina's Allsorts, Aero knitting needles

I've had this set of knitting needles for over 25 years and bought them through an advert in my mother's Woman's Weekly. (I think we all read it at home and there was always something in it to make, be it clothing, toys or ornaments.) They're made by Aero, who I don't think are in business anymore and are really good quality. I've still got all the accessories that were in it although a couple are around the house somewhere. Things were made to last back then and I do like to look after things!!

After all my recent crochet and knitting, I decided to support someone else's crafting and treated myself to this absolutely GORGEOUS pin cushion. It's made by a lady called Angele and she designs all her pin cushions (and other things) herself. They're all hand cut from pure wool felt and then hand stitched. The amount of work she puts into each one is just incredible - they sell really fast too! Go and take  look at her Etsy shop - I warn you though, it's all very tempting!


https://www.etsy.com/uk/shop/FabricAndInk?ref=l2-shopheader-name


I've had a couple of days off this past week and the weather was Glorious - I was so lucky!! I managed to get out to Hilliers for a  good long walk but haven't had chance to download the photos yet, so they'll have to keep for another day. I'm also starting to plan another crochet blanket with all the merino yarn I've been collecting in the sales. I now have enough for a good sized lap blanket and have been pondering long and hard on the design. 
I've seen some really nice designs based around squares and circles on instagram recently but to make a big blanket I'd had to make a lot of small pieces, then join them and even though I have a lot of yarn in an assortment of colours, I'm worried I'll run out of a particular colour when it comes to joining and making a border. Sooo.... I've decided to go with stripey again. Yes, I know, again. I'll use my Tooty Stripey Pattern again as a starting point but will pick out my favourite stitches and leave out a couple too. 
I have 2 shades each of grey and pink, ivory and the denim blue in the scarf above. As it's quite a limited palettte I'm going to work out a colour pattern and keep repeating it. I have varying amounts of each colour, so will have to sit and work out how to get the most from the yarn without running out before I get to the end - and have enough to make a border too.

The only thing to decide before I get cracking, is do I want the stripes to run side to side - or along the length?? My Tooty Stripey was originally going to be a really big blanket with side to side stripes but I stopped about half way and they are now vertical stripes. Decisions decisions!! Hopefully I'll have some pics next time of what I settled on and started. And news of the Philippines trip of some friends that i mentioned last week. They spend the day with Mara tomorrow and they must all be so excited!!!!!

See you again soon!!  T  xXx

Wednesday 14 February 2018

A project bag for Mara

If you've been with me for a long time, you might remember when one of my friend's went out to the Philippines to visit Mara, a little girl he sponsors. Looking back , I made several things for her, including a little needlecase   - the tutorial is still on it's own tab at the top of the page. He had the most amazing and emotional time and promised her he would try and visit her again.
He will indeed be going for what will probably be his last visit to her - when she turns 18, sponsorship and therefore contact stops.
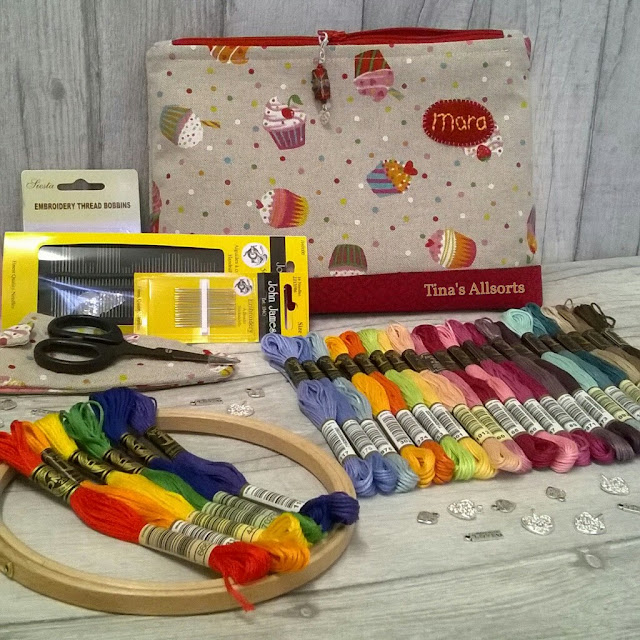
Naturally I wanted to make a little something for him to give her again and I opted for a project bag this time, which I then filled with embroidery threads, along with needles, scissors and a small hoop. I don't know if she even likes sewing, never mind embroidery but she can always pass them on to her Mum and friends. I'm sure they won't go to waste! I made it about the same size as the other project bags I've done and added a little felt label with her name (badly) embroidered on it.

Tina's Allsorts, project bag

I'm looking forward to hearing about his visit and seeing all the photos of their time together - what a trip it's going to be!

If you're interested in reading about what I made her before and his previous trip,  you could follow the link above , or go through the archive to around March and April 2015.
(I've just been having a look back myself and apart from it bringing back a lot of memories, I  was surprised at how much I used to write back then compared to now. I think that's down to instagram more than anything else. I've gotten so used to writing short little posts regularly,  I've sort of forgotten how to write a decent length one. Also, I normally write my posts on my tablet, so I'm doing it with one finger not a keyboard and it's hard to add links etc. I should make more effort to get the laptop powered up!!)

I wonder what the temperature is in her part of the world? It's been really cold here! It's supposedly around 6 degrees C but often feels so much colder with a biting wind. Brrr! I'm desperate to go for a long walk but I really don't want to brave the cold. At least it isn't raining today - I'm tired of the rain that seems to have been with us almost constantly for weeks. It hasn't really, it just feels like it. But the days are getting longer at least - it's so good to be able to drive to work and back in daylight - even if the traffic has been horrific!


I'll pop back later in the week with some pics of last week's dog coats being modeled by their new owners. They're a really good fit thank goodness but I'll be happier once I've heard if the buttons are easy to do up on a wriggling dog!!!

See you later.  T xXx


Tuesday 6 February 2018

Doggy Coat Ta-Dah!

Ooh look - a Ta-Dah post!! I haven't done one of those for a while.

I'm not sure if I mentioned it before but I was commissioned to make a pair of dog coats for a lady in the US. It was the same lady who ordered the crocheted project bag at the end of last year (although it had some modifications so she could use it as a handbag/purse.)
She has 2 pugs and asked for coats to keep them warm in the winter when they go out. I had a quick look on Ravelry for a pattern I could adapt, as I wanted to make them to my own design really but had no idea about sizing and shaping. I found the Well Dressed Dog Coat by Tamara of Moogly Blog and whilst it was made in aran yarn and quite plain, it had all the measurements I'd need.
I requested some measurements of the intended recipients and got cracking.

When she first mentioned dog coats, I knew I wanted to do something along the lines of my Tooty Stripey Blanket, with lots of different stitches and some texture but a limited colour palette. She asked for air-force blue, and I chose a duck-egg green and two glittery yarns in silver grey and teal to compliment them - the overall effect is very pleasing I think and actually looks frosty and wintry with the glitter.
It really was a "make it up as you go along" project with not a single note written down! Luckily, I made the 2 neckbands with their attached yokes first or I might not have remembered the stitch count etc. but after that, I stitched away merrily and completed the first one before I tackled the second. The original plan was to do a few rows of each and keep switching back and forth but I got a bit carried away with the whole design process!! I do so love to make it up as I go along!!

The original pattern has "armholes" for the front legs but I wasn't sure how easy that would be to put on, so redesigned them a little to have button-up flap across the belly. I also wanted them to be completely reversible so she won't have to stop and think about which way out they need to be before putting them on - although this meant I needed to add buttons on both sides. I stitched on a lot of buttons!!
Here are some quick pics of them, although I have taken plenty of others but not downloaded them yet.

Tina's Allsorts, Well Dressed Dog Coat

Tina's Allsorts, Well Dressed Dog Coat

Tina's Allsorts, Well Dressed Dog Coat


They're on their way to the USA now and I can hardly wait to find out if they fit ok.... watch this space on that one!!
I've set up a project page on Ravelry too.

Talk again soon,   T xXx