(Click the link above, or in the side bar to hop across to Ravelry to buy the pattern.)
I'd bought some gorgeous balls of Debbie Bliss Baby Cashmerino in aqua and turquoise quite a while ago now as I knew as soon as I saw them they'd be perfect for it, I just hadn't had time to make it.
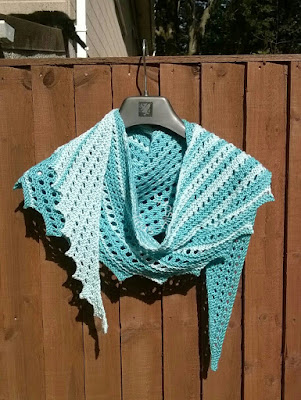
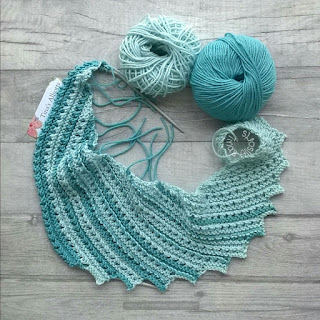
I decided to start with the lovely pale aqua and gradually merge into turquoise. Scroll down for lots of pics and my guide to the stripes.
Anyway, the stripes. As mentioned, I used 2 toning colours in a light and medium shade, although you could probably get a good effect from a more striking contrast of colours.
I made it exactly according to the pattern and had 240 rows when I cast off. If you are aiming for more or less rows, you will need to recalculate.
I began with the aqua yarn (colour 1) and worked the first 60 rows. Then I joined in the turquoise yarn (colour 2) and worked the next 2 rows, cut the yarn for colour 2 leaving an end and picked up colour 1 again. I didn't break off colour 1, I just carried it up the side of the work, "fairisle style" on each row end so I didn't get a loop. Once I reached the point where I needed to carry the yarn over 6 rows, I did break the yarn and joined it in again later. It made for a lot of ends to sew in but the neck edge was neater.
I continued like this, keeping the pattern correct and switching back and forth between the two colours, using the following sequence of stripes -
ROW No.
1 - 60 60 rows colour 1
61 2 rows colour 2
63 8 rows colour 1
71 2 rows colour 2
73 8 rows colour 1
81 2 rows colour 2
83 8 rows colour 1
91 4 rows colour 2
95 6 rows colour 1
101 4 rows colour 2
105 6 rows colour 1
111 4 rows colour 2
115 6 rows colour 1
121 4 rows colour 2
127 6 rows colour 1
133 8 rows colour 2
141 4 rows colour 1
145 8 rows colour 2
153 4 rows colour 1
153 4 rows colour 1
157 10 rows colour 2
167 4 rows colour 1
167 4 rows colour 1
171 10 rows colour 2
181 2 rows colour 1
181 2 rows colour 1
183 10 rows colour 2
193 2 rows colour 1
193 2 rows colour 1
195 12 rows colour 2
207 2 rows colour 1
209 - end continue with colour 2 only
207 2 rows colour 1
209 - end continue with colour 2 only
Here's a link to my striped version on Ravelry - take a look if you want the exact yarn details etc.
and if you make your own, please do link your project as I'd love to see your version!!
Happy Knitting!!


