The buds developed very slowly at first, then when the weather finally warmed up, they fattened up very fast! I suddenly noticed a couple of days ago that the first one had opened, closely followed by half a dozen more. I was up early today and could see a few more just opening, so nipped up the garden and cut them.
I like to display them in champagne glasses - fill with water and stretch a small square of clingfilm over the top, then make 3 tiny holes and push the stems through. Gorgeous! And they have an amazing soft sweet vanilla fragrance. Just watch out for the bright orange pollen!
I've had this same (large) pot full for a good ten years now and they just keep going. I've re-potted them 2 or 3 times over the years to refresh the soil and give them a feed now and then when watering. Oh, and I do spray regularly in the spring to protect from lily beetle!
If you want to grow your own, it's called Lillium Speciosum Rubrum. Readily available from good garden centres and online.
Part of the reason I was actually up early today was to crack on with the CAL bag project I'm joining in with. The first part was released on Wednesday and I made it last night just in one colour to check the tension. I took a quick photo this morning - although I didn't actually need the help that was offered!
Now I need to do it in my chosen colours. And it dawned on me earlier that as it's a bag that's going to be lined, I won't have to stitch the ends in!
Got to wait until next Wednesday for part two. ..
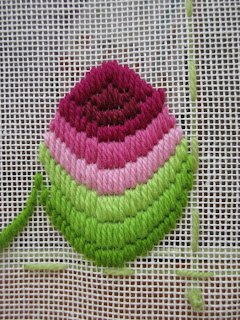
I've been working on the Bargello Alliums this week too. Lyn in the shop really liked it and is quite happy for me to work on it at work. Although I may well lose count and have to keep unpicking...

I've done the bottom row (apart from the very edges that I'll fill in later) and started on the second. I had thought I might use a peachy colour for the little spaces between the flowers but Lyn suggested using a dark green instead. I used a bit of the darkest green leftover from the lavender/bluebell panel and she's quite right. I'll look for a really dark green on Monday. Want to see the whole row? ...
CAL update - here's my first attempt in "colour". I'll do another later in a different combination to bring in the yellow as well. (And yes, it is supposed to look flattened across the top - that's part of the bag shaping.)
Till next time!! T x


No comments:
Post a Comment