Showing posts with label crochet. Show all posts

Thursday, 6 August 2020

Special offer for August!

Hello everyone! 
Just popping by to say my Looks Like Rain Scarf pattern is now 20% off for the rest of August! No code needed either, the discount is made at checkout. 

This is only available on Ravelry I'm afraid as I have never been able to find a discount option on Lovecrafts....

Click  HERE,  or on the picture in the sidebar to hop across to Ravelry. 
What colour will you make? 

Tina’s Allsorts Designs, Looks like Rain Scarf

Thursday, 16 July 2020

Coming along nicely

I'm not rushing with writing  up the pattern for  my Allsorts Blanket- it's taken me 3 years to properly start, so I might as well take my time and get it right! 

The centre panel was finished and  then I started trying out different borders. Nothing too flashy this time  - it's a busy blanket and I don't want the border to detract from it. My original version had a multicolored border but I realise now it was probably a bit much. But it was as much to do with not having enough yarn in one colour and I didn't want to buy another ball.

So I've gone for a very simple border  that's similar to  the original. Along the  way  though, I've been trialling some different edgings too and taking pics of each. After all,  you might not want a simple border. 
Would you like to see? 


This first one is rows of trebles, topped with the flower pattern from the blanket  - but strictly speaking, it isn't reversible as an edging. 

Tina's Allsorts Designs,  The Allsorts Blanket

Then I tried same treble rows topped with moss stitch. You may need to go up a hook size for the moss stitch though  - at least I do!

Tina's Allsorts Designs,  The Allsorts Blanket

Try trebles followed by a row of dc+ch 1 in every stitch -

Tina's Allsorts Designs,  The Allsorts Blanket

Or how about post stitches? This is pink posts on one side and cream on the other. 

Tina's Allsorts Designs,  The Allsorts Blanket

You could even add pompoms! 

Tina's Allsorts Designs,  The Allsorts Blanket

This next one is made from two rows of dtr 'bobbles' worked in the same colour, so you get bobbles on both sides. 

Tina's Allsorts Designs,  The Allsorts Blanket

As mentioned though, my pattern sample, has been finished much like the original, with rows of granny stitches and a contrast edging but this time with one colour and a contrast edge. 

Tina's Allsorts Designs,  The Allsorts Blanket


The finished pattern is a little way off yet. I need to take some photos to go with the instructions  - then go back to drawing the chart.... then join all the different sections together into a cohesive pattern...

So watch this space. Still...

Thursday, 2 July 2020

The Tooty Stripey Blanket finally gets written up!!!

There is now a fully written pattern of this blanket, with full charts, plenty of photos and loads of information, called 
- available on Ravelry.


Who recognises this photo?? This is the stripey blanket I made for a friend's little girl when I was still learning how to crochet, way back in Dec'12 - Jan'13. 
I had a (birthday) deadline, so it was made very quickly, with no notes written - why would I  need notes??

Tina's Allsorts Designs, Emma's Stripey Blanket

 I created a project page on Ravelry and shared pics on Pinterest, including this one 
(I used to spend a lot of time on Pinterest back then). I haven't checked recently but I know at one point it had been re-pinned nearly 50,000 times!!

A blanket that was that popular deserved a written pattern surely? So in 2017, when the craft shop I used to have a part time job in, started selling yarn I decided to buy a selection of baby colours and make a new version of Emma's Blanket. And by that time not only had I learned some more stitches - I and discovered TEXTURE!
I set to making a new blanket, designing as I went, trying to write notes along the way but quickly gave that up as the blanket grew just too fast to keep up! Once it was finished, I painstakingly drew a chart detailing every row and so a new blanket was born - the Tooty Stripey Blanket! 

I published the chart on Ravelry in July 2017 and watched it quickly take flight - this  assisted by several free pattern sites that picked it up, and kindly advertised it for me for free!!

It doesn't seem possible that 3 years have passed since that design stage. I've now made several versions myself in different sizes and colours and it has become my signature blanket. And the free chart has been downloaded from Ravelry 17,500 times!!!

Back in mid-April and after much soul searching, I decided to add a very small fee to the pattern (I described it as a 'buy me a coffee' fee), along with a coupon code so customers could sill have it for free if they preferred. 
Several people over those years have said I should have charged for it from the start but it was my first pattern - and just a hand drawn chart at that - but you know I just didn't think it was good enough (or had the confidence!) to charge a fee. 

But then I released my Hope Springs Hat during lockdown. I had already decided to offer it for free during lockdown with a coupon code but I found a very small number of people were paying for it. I thought at first that I hadn't set the coupon code up properly but then a couple of  those people got in touch to say thank you for the freebie but they could afford to buy the pattern and wanted to support my design efforts by paying for it. Hence the soul searching with my blanket. 

Maybe some of those 17,500 people would have been prepared to pay a little for it... So I added a price that meant after all the fees from Paypal & Ravelry are deducted, I would be left with an average of £1 per copy. And I made it as clear as I could that it could still be downloaded for free with a coupon code.
And you know what, a few people have chosen to pay for it - if you're one of them, THANK YOU!!!

Those few sales have spurred me on to write up the pattern in full, pulling together all the other detail from it's blog page, re-writing, occasionally correcting and adding all the extra info I can think of. Hopefully, there will be photos of different stages and if I can manage it, a new computer generated chart, rather than hand drawn (eek!!).

Writing a pattern means testing it as I go by making  a new blanket but there was a problem. Lockdown had not been lifted and the wool shops were not open. I know I could have ordered all the yarn I wanted online but it's just not the same as choosing colours in person. So I kept writing and refining, a bit of testing with some scrap yarn but I felt desperate to buy a nice collection of colours and get cracking with it!!!!!!

Tina's Allsorts DesignsFinally, in mid-June I heard Hobbycraft was opening! I went mid-afternoon, hoping the long queue would have happened first thing and I would only have to wait 10 minutes. But no, I waited for an hour and a half!!! Yes, a full HOUR & a HALF. This was entirely due to someone's decision to only allow 19 customers in store at a time. It's a huge warehouse but just 19 people at a time?... But I was desperate, so I waited patiently. And once I was in I wasn't leaving without a big bag of yarn, so I really took my time choosing colours!!!

Now they don't have the best range - they're not a yarn shop after all. So I came home with a big bag of 12 balls of wool - which received admiring glances from those still in the queue.!!
I took a photo of said bag, posed on the very first Tooty Stripey Blanket I had made, which used colours that reminded me of the Tooty Fruity Sweets that inspired the (ridiculous) name. And guess what??
I'd chosen new colours that looked just like the originals!! I had even bought a variegated ball!! That was definitely NOT my intention as I had hoped for a nice balance of summery colours. But I suppose you have to go with what you can get...
 
Tina's Allsorts, The Allsorts Blanket
After getting over my initial annoyance, I made a start on planning a colour repeat. I made some little bobbins of each colour, with 2 each of the paler colours and just one of each bright colour - a total of twenty for my colour repeat.
I ummed and aahed for quite some time, moving them around and taking lots of pics. I added a golden yellow from my stash and a magenta. Still I wasn't quite happy though.
Finally, I decided to toss out the brighter colours you can see in this pic  and went with just the eight pastel rainbow colours that remained. 
Pity they didn't have any lilac ...

Tina's Allsorts, The Allsorts BlanketThat would make the new blanket sample look even closer to the original but by then I had decided it was actually quite fitting to completely revisit the original. 

And don't worry about the colours I tossed out - I already have a project in mind for them!!

During the weeks without fresh yarn, as I said,  I had been refining and tweaking the original design, adding some extra texture rows so that they really do hop from side to side at regular intervals and taking out a couple of bits I wasn't so keen on.

Once I had yarn and started hooking, things progressed reasonable smoothly. However, there were some hiccups along the way... 
I knew I should trust my own pattern, having spent so much time and effort getting it just right. But I just couldn't help trying to tweak-as-i-go... although most of those attempts ended up with a whole lot of ripping back and doing what the pattern said - including one section that had 13 rows!!!
 
Once the main body of the blanket was completed, I  started stitching in all the ends, ready to start on the border. I considered stitching in as I went but as this was my working sample - and I kept tweaking then ripping out - I thought it wise to leave them all until the end. Once they were all done it had a little photo-shoot and will get a light blocking to properly straighten the edges, before adding the border.

But it's going well so far. Very well actually. I have a BIG smile as I look at this photo -

Tina's Allsorts, The Allsorts Blanket

I've also thought long and hard about what name to give this new, fresh version of the #tootystripeyblanket . As It will be a paid pattern on Ravelry, it can't have the same name as another pattern I sell. I also want to distinguish between the chart only version and the fully written. So a new name was needed and it dawned on me that there really was only one name that would fit. 
May I introduce my signature blanket, The Allsorts Blanket!!
Shame I didn't think of it 3 years ago when I settled on tooty stripey...

Tina's Allsorts, The Allsorts Blanket


There's still quite a way to go before I can publish the pattern, not the least of which will be drawing the new chart... But it will be announced here, as well as over on Instagram. And probably fb too....

Watch this space, as they say!!  Bye for now, T xx


Monday, 6 January 2020

A New Year Ta - Dah!

Happy New Year! And let's face it,  I'm just no good at blogging anymore...
Admittedly, 2019 was one of my worst years in many ways,  so blogging was not high on my agenda but even so, if you look back at how often I've posted each year they just go down and down!
But I'm not going to stop entirely - just say that I will be an infrequent visitor. 😕

If you'd like to see what I've been making over the past year, then pop across to
Instagram for a scroll through. I wish it would let me share to blogger... For the moment I'll show you my most recent make. To be completely honest, as I type this, it isn't actually finished  - I ran out of yarn for the final row, with just 3 feet to go! A trip to the shops later. (All finished now!)

This is the Little Gem Blanket ( #littlegemblanket ) , designed by Marion of @woolthreadpaint , and the pattern is free on her blog.
I went a bit overboard when I was buying yarn and choosing colours - I think I ended up with 25 - the new balls shown in the pic below, plus some from my stash!!!! On reflection, I should have left some out but it still looks fine.
And the number of colours doesn't seem to have bothered anyone else as it's been getting a lot of love on Instagram.

I made some changes to the pattern as I went out of necessity, as i wanted to make a rectangular blanket, not square. Plus I went for different colours obviously, and also a different placement of colours for one of the striped borders. But on the whole, I did, for once, (almost!) follow the pattern exactly.
Te weather so far this year has been no better than December.... So I haven't been able to get a photo of the whole blanket in good daylight - and artificial light gives it a decidedly yellow tone unfortunately. So there's no proper ta-dah photo I'm afraid, only fragments... but there's lots of them!!!

Tina's Allsorts, Little Gem Blanket

Tina's Allsorts, Little Gem Blanket

Tina's Allsorts, Little Gem Blanket

Tina's Allsorts, Little Gem Blanket

Tina's Allsorts, Little Gem Blanket

Tina's Allsorts, Little Gem Blanket

Tina's Allsorts, Little Gem Blanket

Tina's Allsorts, Little Gem Blanket

Tina's Allsorts, Little Gem Blanket

Tina's Allsorts, Little Gem Blanket

Tina's Allsorts, Little Gem Blanket

Tina's Allsorts, Little Gem Blanket

Tina's Allsorts, Little Gem Blanket

Tina's Allsorts, Little Gem Blanket

I had  slight wobble at this point and thought I needed to make a funny shape to make the stitch count work for the next border. It had been 10 weeks since I planned everything and checked the maths to be sure it would all fit - naturally I didn't write any of it down...
Luckily I did remember that all I had to do was add an extra two granny rows to the striped border, then the squares would fit perfectly.
But this pic shows those 2 odd shapes I was going to add to the long edges.

Tina's Allsorts, Little Gem Blanket

Tina's Allsorts, Little Gem Blanket


Tina's Allsorts, Little Gem Blanket

Tina's Allsorts, Little Gem Blanket

Tina's Allsorts, Little Gem Blanket

Tina's Allsorts, Little Gem Blanket

Tina's Allsorts, Little Gem Blanket

Tina's Allsorts, Little Gem Blanket

Tina's Allsorts, Little Gem Blanket

Tina's Allsorts, Little Gem Blanket

As and when the sun comes out (while I'm at home!), I'll try and get some full length pics to share.

Happy New Year - and probably see you again a Easter!!! 

Friday, 6 September 2019

Looks Like Rain Scarf


Believe it or not, I started writing this post more than 2 months ago..... where DID those 2 months go??

This was supposed to be a proper Ta-Dah post of my new design, the Looks Like Rain Scarf. But I'm so late finishing it that I have published another design since!

Ah well, I might as well write a few words about it now I'm here.


Tina's Allsorts Designs, Looks Like Rain ScarfThis design was born in the autumn last year but not quite finished. I got stuck over adding a proper traditional 2" pompom at each end - when the answer was actually to start the crocheted pompom trim right on the corner. It just took me 6 months to think of that and get it written! Originally it was going to be called Cirrus - but then I found that one of the 'big' designers had recently used that name herself.... so after a lot of thinking, I came up with Looks Like Rain. And that's when the hot weather broke and it began to rain...
This is one of my early pics of it - 

Tina's Allsorts Designs, Looks Like Rain Scarf

I was a VERY lucky girl indeed - as soon as it was published, it got picked up by someone who runs a forum group for people who like making scarves and shawls and it got posted there. Hence, it got a lot of views and it even got into the top twenty most viewed ptterns on Ravelry - for about ten minutes!!  


If you would like to take a look yourself, you'll find it HERE. 

During the final design process I had 6 fabulous ladies who tested the design for me prior to publishing and they did an amazing job! They all had their own ideas about what yarn to use - and how many colours to use  - one lady even added tassels! 

Just take a look (and you will find links to each lady right at the foot of this post too) -

Pat aka @indigipobble, Looks Like Rain ScarfPat aka @indigipobble, Looks Like Rain Scarf                         
Pat aka @indigipobble, Looks Like Rain Scarf

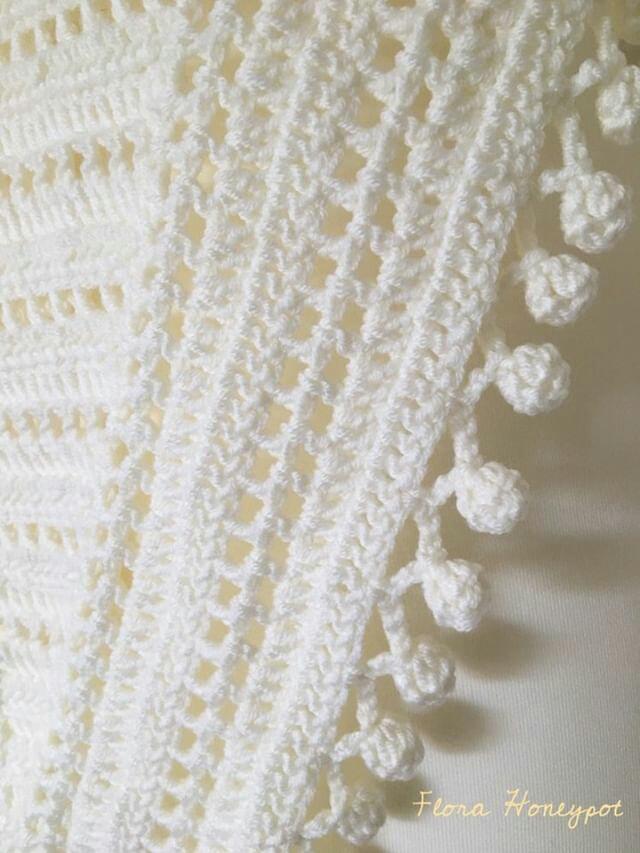
Helen aka @Florahoneypot, Looks Like Rain Scarf

Helen aka @Florahoneypot, Looks Like Rain Scarf

Liz aka @Bizzymitts, Looks Like Rain Scarf


Liz aka @Bizzymitts, Looks Like Rain Scarf

Liz aka @Bizzymitts, Looks Like Rain Scarf

(Liz of Bizzymits (the pics just above) put me to shame by very quickly writing her own amazing blog post!!!! I really am out of practise at this.... Pop across and have a look at her blog for a read!!)

Elspeth aka @CraftyKoalabear, Looks Like Rain Scarf                    Elspeth aka @CraftyKoalabear, Looks Like Rain Scarf 

Jan aka @Perky_Puffin_Crochet, Looks Like Rain Scarf

Jan aka @Perky_Puffin_Crochet, Looks Like Rain Scarf

Robyn aka @3Littlepears

Robyn aka @3Littlepears

Robyn aka @3Littlepears


Having seen what my testers were doing with the pattern to add their own twist, I tried it with a very fine alpaca and silk blend and added beads along the edge instead of the pompoms. And, oh, those beads!! They looks so sophisticated!

Tina's Allsorts Designs, Looks Like Rain Scarf

Tina's Allsorts Designs, Looks Like Rain Scarf

But I was also keen to show what could be done if you only had one skein available, so made this next one. By simply adjusting the number of increases and then reducing the number of repeats to shorten the length, and finally, replacing the pompoms with a picot trim, I came up with this -

Tina's Allsorts Designs, Looks Like Rain Scarf

And I wish you could see the yarn in real life too as it is the most amazing hand dyed yarn. The colourway is called 'Demelza', by Biff Sugar Yarns

The I tried it with a hand dyed double knit merino yarn (unpicked from a previous unworn project), and inspired by my testers, I teamed it with a plain ivory for the border. Then added tassels!!

Tina's Allsorts Designs, Looks Like Rain Scarf

Tina's Allsorts Designs, Looks Like Rain ScarfTina's Allsorts Designs, Looks Like Rain Scarf 

Tina's Allsorts Designs, Looks Like Rain Scarf

And how come I suddenly started taking pics with the assistance of a tailors dummy? Well, I finally looked into buying one and when I realised they were actually quite reasonably priced, I couldn't really hold off buying one any longer. Her name is Lottie - because she's going to live in the Loft when she isn't on a job!! And where did I set her up to take pics.... take a look!

Tina's Allsorts Designs

As you can see from the heap on the corner of the sofa, I had to move a lot of (crafty) clutter out of the way first! But it worked quite well really.

Making this design gave me ideas for the next one. Which in turn, might well inspire a future design!! Although, to be honest, I really would like to write a 'written' version of my Tooty Stripey Blanket first. But that will take a lot of work, so may be a long way off...

If you're really lucky, I might make it back before another 2 months have gone by... But then again, it might just be easier to follow me on Instagram....


Here are some links to my testers instagram pages, so you can pop across and visit -

Pat aka @indigipobble


Liz aka @Bizzymitts

Elspeth aka @CraftyKoalabear

Helen aka @Florahoneypot

Robyn aka @3Littlepears