Showing posts with label Knitting. Show all posts

Friday, 9 April 2021

Tardy Ta - Dah !!!

 I'm only about two months late with this post.... You may have seen it already but I designed a hat based around a previous love - Patchwork & Quilting.

Several years ago I was a slave to the cutting board and sewing machine and would spend many, many hours creating quilts and quilted items. Eventually, it started to play havoc with my back and I had to look for something else to do, and ended up with a new passion of crochet!!

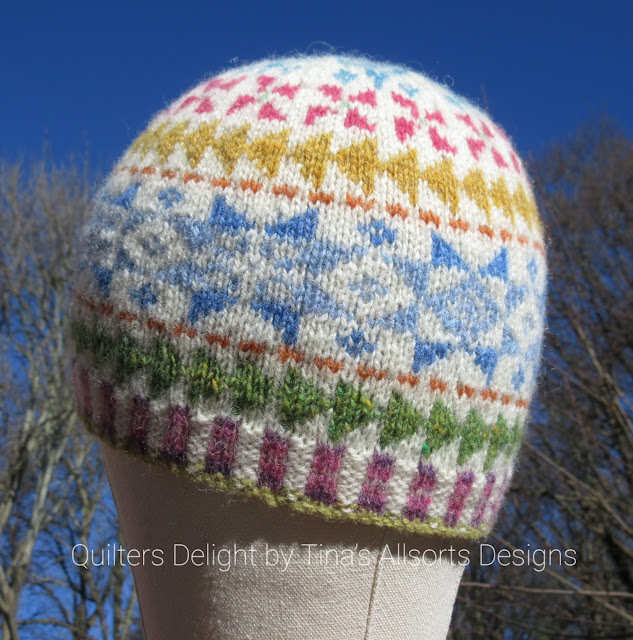
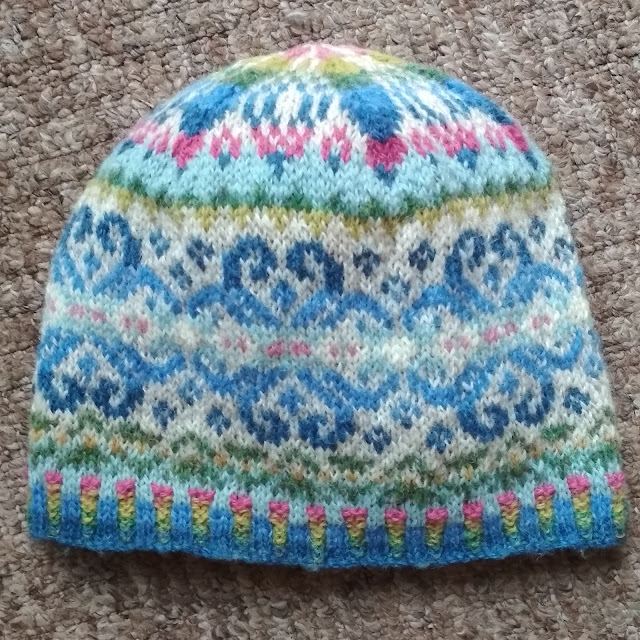
Time has moved on again and now I have a passion for fairisle hats. While chatting with someone about my last hat, Boanny Starns, I mentioned that one of the stars on it looked like a quilting block - and that was a light-bulb moment!! A fairisle hat based on my favourite quilting blocks and before you knew it, I had designed 'Quilters Delight'!

In true patchwork style, it's a real stash buster as most of the colours used take just two grams of yarn or less. And there are quite a lot of colours!!

Quilters Delight by Tina’s Allsorts Designs

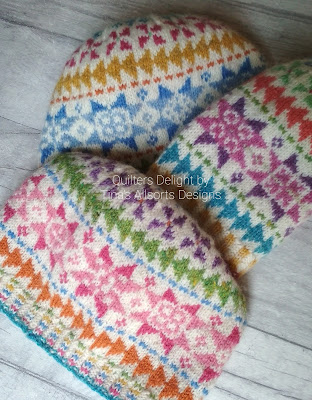
Rather than have just one star as the main motif, I devised eight different centres - and it's surprisingly easy to work those different centres following the simple instructions in the pattern.

As I made each sample with different colours, I kept changing the pattern on the crown until - finally - I was happy with the result. This one -

Quilters Delight by Tina’s Allsorts Designs

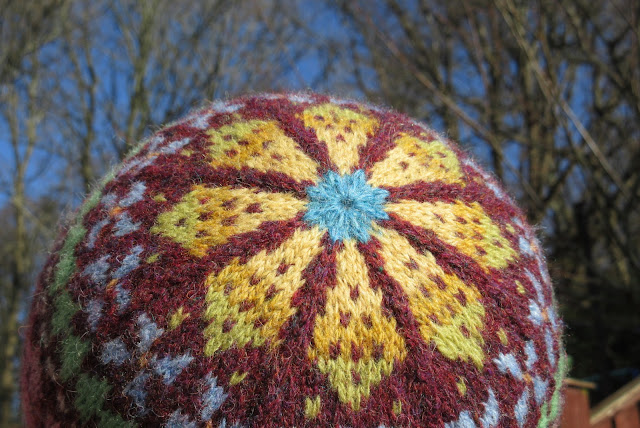
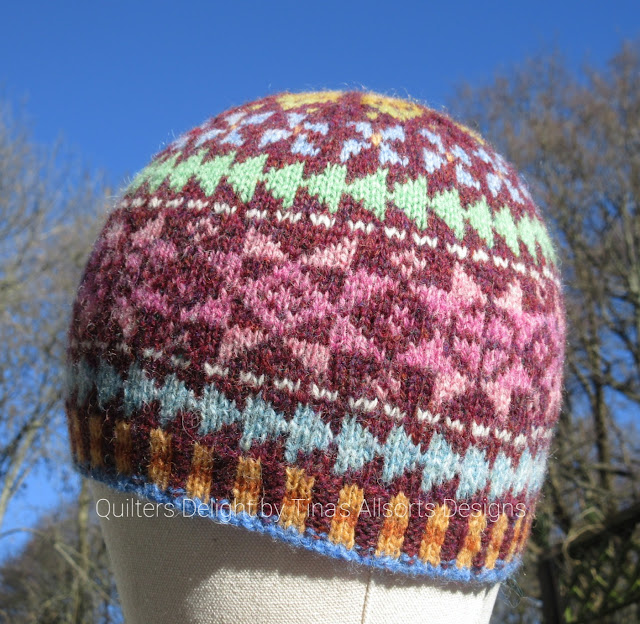
I tried to use all my favourite quilt blocks - flying geese, stars, pinwheels. And the corrugated rib is a play on a colourwash/bargello quilt. Although I must admit to never having made the Dresden plate that features on the crown...

As you can see from my samples, you really can use whatever colours you have to hand for a truly one-of-a-kind hat.

Quilters Delight by Tina’s Allsorts Designs

Quilters Delight by Tina’s Allsorts Designs

Quilters Delight by Tina’s Allsorts Designs

Quilters Delight by Tina’s Allsorts Designs

Quilters Delight by Tina’s Allsorts Designs

Quilters Delight by Tina’s Allsorts Designs


Quilters Delight by Tina’s Allsorts Designs

If you don't like sewing in the ends, I explain how to weave them in as you go!

Quilters Delight by Tina’s Allsorts Designs

Click on any of the photos to take you to the pattern.

I'm already working on the next design and the pattern is being written as we speak!! To be honest, I've been working on it on and off for over a year now and finally reached a point where I was (almost) happy with it. 
This one will also feature lots of different colours, although there's no reason why you couldn't make it with a more limited palette if you prefer.

I'll try and make sure to pop back and show you when it's published, rather than two months later!! For now, here's a little sneak peak.

Bellamy by Tina’s Allsorts Designs

Happy Knitting!!

Monday, 16 November 2020

New Design - Finding Balance Hat

 I have just published a new hat design!!! Really happy with this design at last, although it was a long time in the making...

I started out wanting to make another fairisle style hat with several colours but kept getting stuck with my colour choices... I wanted to use Shetland Sprindthrift again but with only online ordering available, some of the colours I chose didn't go together as well as I had hoped... There was a lot of re-jigging and eventually I gave up!

I decided to concentrate on getting the balance of the motifs right first, working with just two colours - and then re-introduce more colours. But once I had the motifs just right I really liked the look with just two colours. Really really liked it! So I wrote the pattern with just two colours and called it 'Finding Balance', as the name seemed to fit not only with stripping it back to the basics to 'find the balance' between the motifs but also trying to find a way to balance all the crap this year is throwing at me and everyone else... I'm sure crafting helps us all find a way to find balance.

I made my first sample using Drops Nord, a gorgeously soft and squishy alpaca/wool/polyamide mix. A 50g ball in each of two highly contrasting colours is enough to make two hats.

It's available on Ravelry here - Finding Balance Hat 

Finding Balance by Tina's Allsorts Designs

Finding Balance by Tina's Allsorts Designs

Finding Balance by Tina's Allsorts Designs

It's available on Ravelry here - Finding Balance Hat 

I have decided to support the Shetland MRI Scanner Appeal, so until the end of 2020, I will be donating 20% of my sales of the pattern to them.

Although they have raised enough to buy the MRI Scanner, they still need a building for it, train the staff and all the associated running costs. It's a massive project for a small community.

 UPDATE:   Finding Balance proved to be quite popular and I sold a few of my first hat design Hope Springs as well. I was able to make a donation of £51 to the Appeal. 
If YOU  bought the pattern, then THANK YOU!  

Please pop across to Ravelry and take a look -  Finding Balance Hat 

Happy knitting!!!!  Tina xXx


Sunday, 6 September 2020

Special offer for September

 Thank you to everyone who bought Looks Like Rain Scarf during last month's offer! 

The end of August was considerably cooler than the start and I even wore my scarf indoors a couple of times! 🤪 I didn't go as far as wearing a hat - but I did look at my hats.... 

So I figured maybe it would be nice to have an offer on my Hope Springs Hat. So for the rest of September, you can save 20% on Ravelry, with code Autumn. 


Click HERE to pop across to the pattern page. Don't forget to use the code Autumn at checkout,  and share your version with #hopespringshat . 

And if you've been popping in regularly to check on the launch of The Allsorts Blanket - the fully written version of the Tooty Stripey Blanket, then I'm pleased to say it's nearly ready and I hope to publish by the end of the month! 

Woo hoo!

Tuesday, 5 May 2020

Foray into Fairisle, parts IV, V, VI, VII ..... etc etc.... And a Ta - Dah!!

Well, we've now been under lockdown due to coronavirus for over 6 weeks...
Such a  scary time to be living in for so many people. I really appreciate being in a country where the government is doing everything it can to support everyone.
I've been working from home which is not the simplest thing when much of what you do is paper based!! Many of my colleagues are also working from home but actually gardening and sunbathing... I'd like to be knitting more and working less but there you go.

It almost seems pointless now talking about my next step in my Foray into Fairisle, as I have progressed so much since my last post that this needs to probably be part 10!!

Having made the grey and gold affair, I then hunted out the 4 ply I had safely tucked away for the day when I was ready to knit with it myself. I had asked a friend to make me a pair of mittens several years ago and there was a lot of yarn left over. I took the precaution of buying an extra ball of the background colour so that one day, far into the future, I could use it myself.
Well, the day had come and I got it out, bought the hat pattern that matched those mittens and tentatively got started!! On what felt like very tiny needles...
It turned out to be easier than I thought and grew surprisingly quickly. Although, I will admit that I had made the first pattern repeat of the little flowers before I decided maybe I should have gone back and re-read that tutorial I mentioned weeks ago by Julie of Little Cotton Rabbits. It was at that point that I realised I'd been doing it wrong all these weeks with all my Baa-ble Hats! I'd been holding the dominant yarn in the wrong position... So if you're just starting your own #forayintofairisle , then please, go and read this tutorial first.

Anyway, I corrected the way I was holding the yarn (no, I didn't unpick...) and finished that hat and was absolutely GOBSMACKED that it looked just liked the photos in the pattern!! Remarkable! I couldn't quite believe it had come from MY HANDS! Here it is, along with the mittens my friend made  -

Tina's Allsorts Designs

 I then started looking for more gorgeous hats I could make.
There are quite a lot of lovelies on Ravelry when you look.... The first one I chose was called Sea Pinks and was made in pure Shetland 4 ply, which I ordered from Jamiesons of Shetland. Yes, actually in Shetland, yet it arrived very quickly. I thought it might make a slightly rough feeling hat but once washed it has this trick of 'blooming' and becoming beautifully soft and slightly fuzzy. It also blocks very well and as I have quite a tight tension, I was pleased to find I could stretch it a bit too!!!
(I decided to try and redesign the centre of the crown, so what you see below differs a little from the pattern.)

Tina's Allsorts Designs, Sea Pinks Hat

Tina's Allsorts Designs, Sea Pinks Hat

Then I looked for the next pattern and chose Harriet's Hat, a gorgeous pattern designed especially to raise funds for an MRI scanner for the Shetland islands. Currently, they have to travel to the mainland.

I only had the colours I had used for the Sea Pinks hat and again, I had taken the precaution of buying an extra ball of the background colour. This one progressed a little slower as I was having to decide on what colours to use together as I went along, rather than simply follow the pattern but it worked out just fine and I was very pleased with it. And her crown design is to die for!

Tina's Allsorts Designs, Harriets Hat


Tina's Allsorts Designs, Harriets Hat


Then I wondered whether a hat made with merino would work just as well. I hunted out some leftovers of merino 4 ply in ivory for the background and a beautiful hand dyed yarn called 'Rose Gold'. I had another hunt for the perfect pattern and found a lovely one called Cadha. Again, I had to make some minor adjustments to the design as I wasn't convinced there was enough contrast between my yarns but all was well in the end. I'll make another like this one day - one yarn for the background and a single variegated yarn for all the colourwork.

Tina's Allsorts Designs


Tina's Allsorts Designs

Then I decided I was ready to DESIGN MY OWN!!!!!!! I had quickly realised that all the 4 ply beanie style hats I had made had the same number of stitches (144) and pretty much the same number of rows (about 70).

I ordered a really good book full of  different motifs and borders and set to work putting them together. I also spent a ridiculous amount of time choosing new colours online to make it with...

The number of stitches truly is a magical number. 144 can be divided by 2, 3, 4, 6, 8, 12, 18, 24, plus an awful lot of others. I opted to stick with patterns that would all fit into a 24 stitch repeat to make the charts work better together.

The possibilities are endless but eventually I settled on a large motif for the main body with a narrow border below and above, then a fancy crown.
Crown's are quite tricky to design though!! You really need to be able to visualise what's going to happen with the decreases in 3D - you can create starts, arrows, flowers and allsorts!! I just need to find a really good book that explains the principles clearly, or a website. Not found one yet apart from this one by Kate Davies Designs but that only explains how to work the decreases and draw the chart shape.

It took me quite a long time to draw it all out, although that process was speeded up ENORMOUSLY by using Stitch Fiddle. If you've never used it to help design your own, go take a look now!! It's a free site but you can pay a small fee to gain access to extra tools, on a monthly basis if you want to, or like I now have, get 50% off by paying for a full year.

After a lot of faffing, I had my design ready and started knitting it using the new colours that I had ordered, including some lovely blues.
It didn't all go smoothly though... I kept putting progress pics on instagram and everyone said they loved it, including the crown. But I wasn't completely happy with it myself. There was something about it that really jarred with me...

Tina's Allsorts esigns, Hope Springs Hat

Tina's Allsorts Designs, Hope Springs


I couldn't quite put my finger in it but there was something about it that was just wrong. Then someone very kind left a comment saying the pattern for the body was fine and the pattern for the crown was fine - but they were different styles. That was it!!! The body was very floral in style and the crown was geometric!
So I got the scissors out and cut it off! (I made a video of it as I don't plan on repeating it!)


( ** I'll com back and add tha little video later! **)


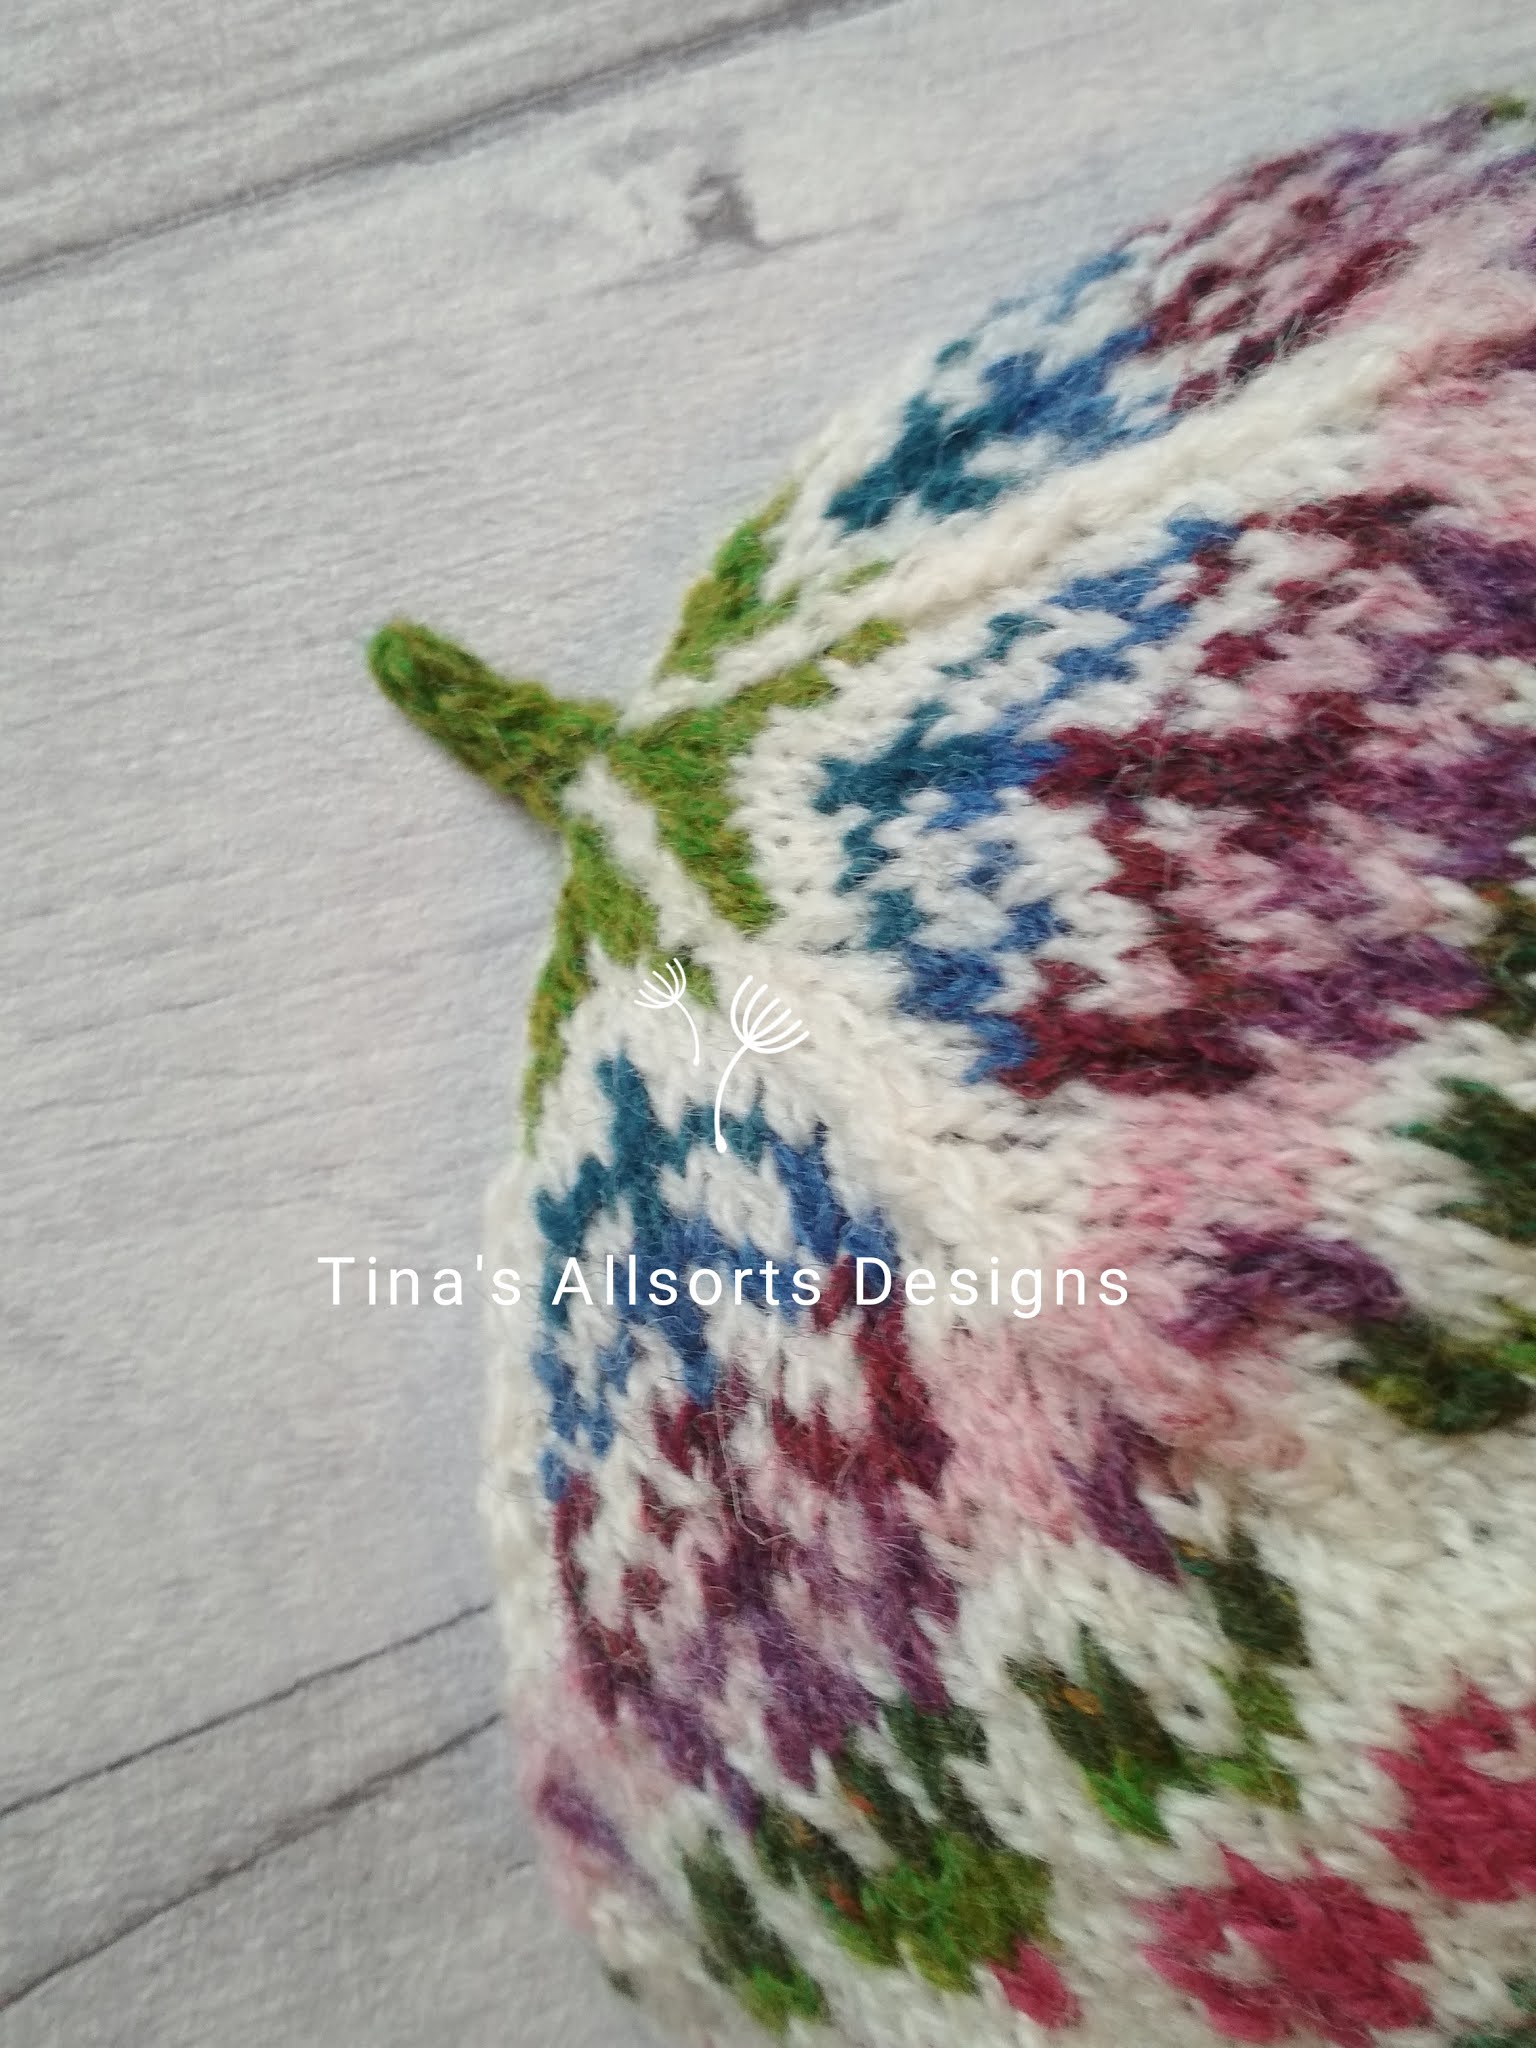
I must admit, regardless of how carefully I did it, I really enjoyed cutting it off!! (I have kept that crown and one day I might design a geometric body and graft them together.) And no, I wasn't worried about everything unravelling before I got it back on the needles. Remember I said it was a fuzzy yarn?? Well, I was confident that all those fuzzy bits would 'hold hands' throughut the cutting process and all would be well. And it was! Up until Fluffy came throught the ct flap while I was mid cut... I think I must have flinched slightly as I knew he would jump straight up on the table, which he did, so I cut the stitch on the row below by mistake. I had to then unpick that row but never mind. Still quicker than starting again!!

Tina's Allsorts Designs, Hope Springs crown


I set to work designing a new crown and finished the hat a second time. Now I was very happy with it, it was just perfect!!
I asked everyone on instagram what I should call it and the most popular suggestions were 'Hope' and 'Spring' - hope for a better future after lockdown and looking forward to the spring. So I joined them together and Hope Springs was born!

Ta - dah!!!!!!!

Tina's Allsorts Designs, Hope Springs Hat


Then I had to sit and write up the pattern to go with it, work on the charts to get them just right and create the Ravelry listing. I had already decided to make it free during lockdown using a coupon code, with a small fee thereafter.

I published it just after lunch on Good Friday - and someone saw it and downloaded it within 5 minutes!! Then there was another and another, and another.... and lots of people were leaving comments saying thank you - I mean LOTS!
Then someone put it on facebook and everything got quite silly.... at one point it was being downloaded ten times a minute! And I got an email for every one...
By the end of the Easter holiday, it had been downloaded over 5,000 times but it just kept going. I've lost track of it now...

I'm really hoping some of those people come back and link their project in Ravelry so I can see what they made. One lady had made hers by Easter Monday and shared some pics! She chose very similar colours to mine -


I was so CHUFFED!! Someone actually made my design  - and straight away!!


Then another lady uploaded her pics! She used colours in her stash and must have very loose tension, compared to my tight tension, as she said she gave it to her husband. She'snow made it again, using the colours given in the pattern.

I can't descibe just how lovely it is to see other people using something I designed! 

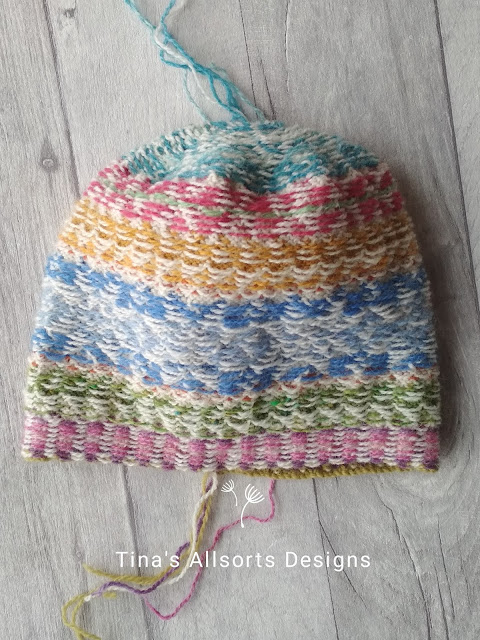
I've been designing (and re-designing over an over...) my next hat but it hasn't been going so well... I chose some more colours and ordered them, knowing they might take a while to arrive but foolishly, whilst designing, I didn't use the new colours but the old ones.... when the new colours did arrive and I started changing the charts I'd been preparing, it just wasn't working. Plus I hadn't ordered enough different colours, they were slightly different on screen etc... I finally settled on something I thought would work and cast on - only to see someone else publish their new hat that day with an almost identical main motif!! Clearly we are using the same stitch dictionery....

Anyway, I decided to knit it up anyway and I'm nearly up to the crown but there are lots of things that just aren't doing it for me - serves me right for not swatching! I hate swatching... So I've decided it will be frogged and I'll start all over again. Frustrating... needs to be right though.
But another book arrived in the post yesterday, so I might try some borders from that one instead!!

I'm adding a photo as a reminder to muself of the one that didn't quite work.....

Tina's Allsorts, The one that didn't work...


Well, that's all for now (it's taken nearly 3 weeks to write this...) but if you like the look of my first design, just follow the link above, or the one in the sidebar, or the one on the Shop tab - and don't forge to use the coupon code Free, or you wil be charged... As I discovered, I now have to pay fees to issue a refund, so won't be doing so without good reason anymore unfortunately.)
And if you download for free but then really like it and think it's worth buying, it would be really lovely if you went back and did just that! It would help pay for the yarn in other colours I should have bought!

Until next time, take care, T    x X x


Sunday, 1 March 2020

Foray into Fairisle Part III Cont'd...

So, what did I do with that hat?? Well, in the end, nothing!
I bought a ball of silver grey and started another hat with the rest of the mustard, knowing that at some point I would run out and would then unpick the first hat to re-use the yarn.
I made the rib and got half way up the snowflake but wasn't convinced it looked better. The mustard certainly looked a lot brighter. A lot!! But not better with the silvergrey... There just wasn't enough contrast I think.
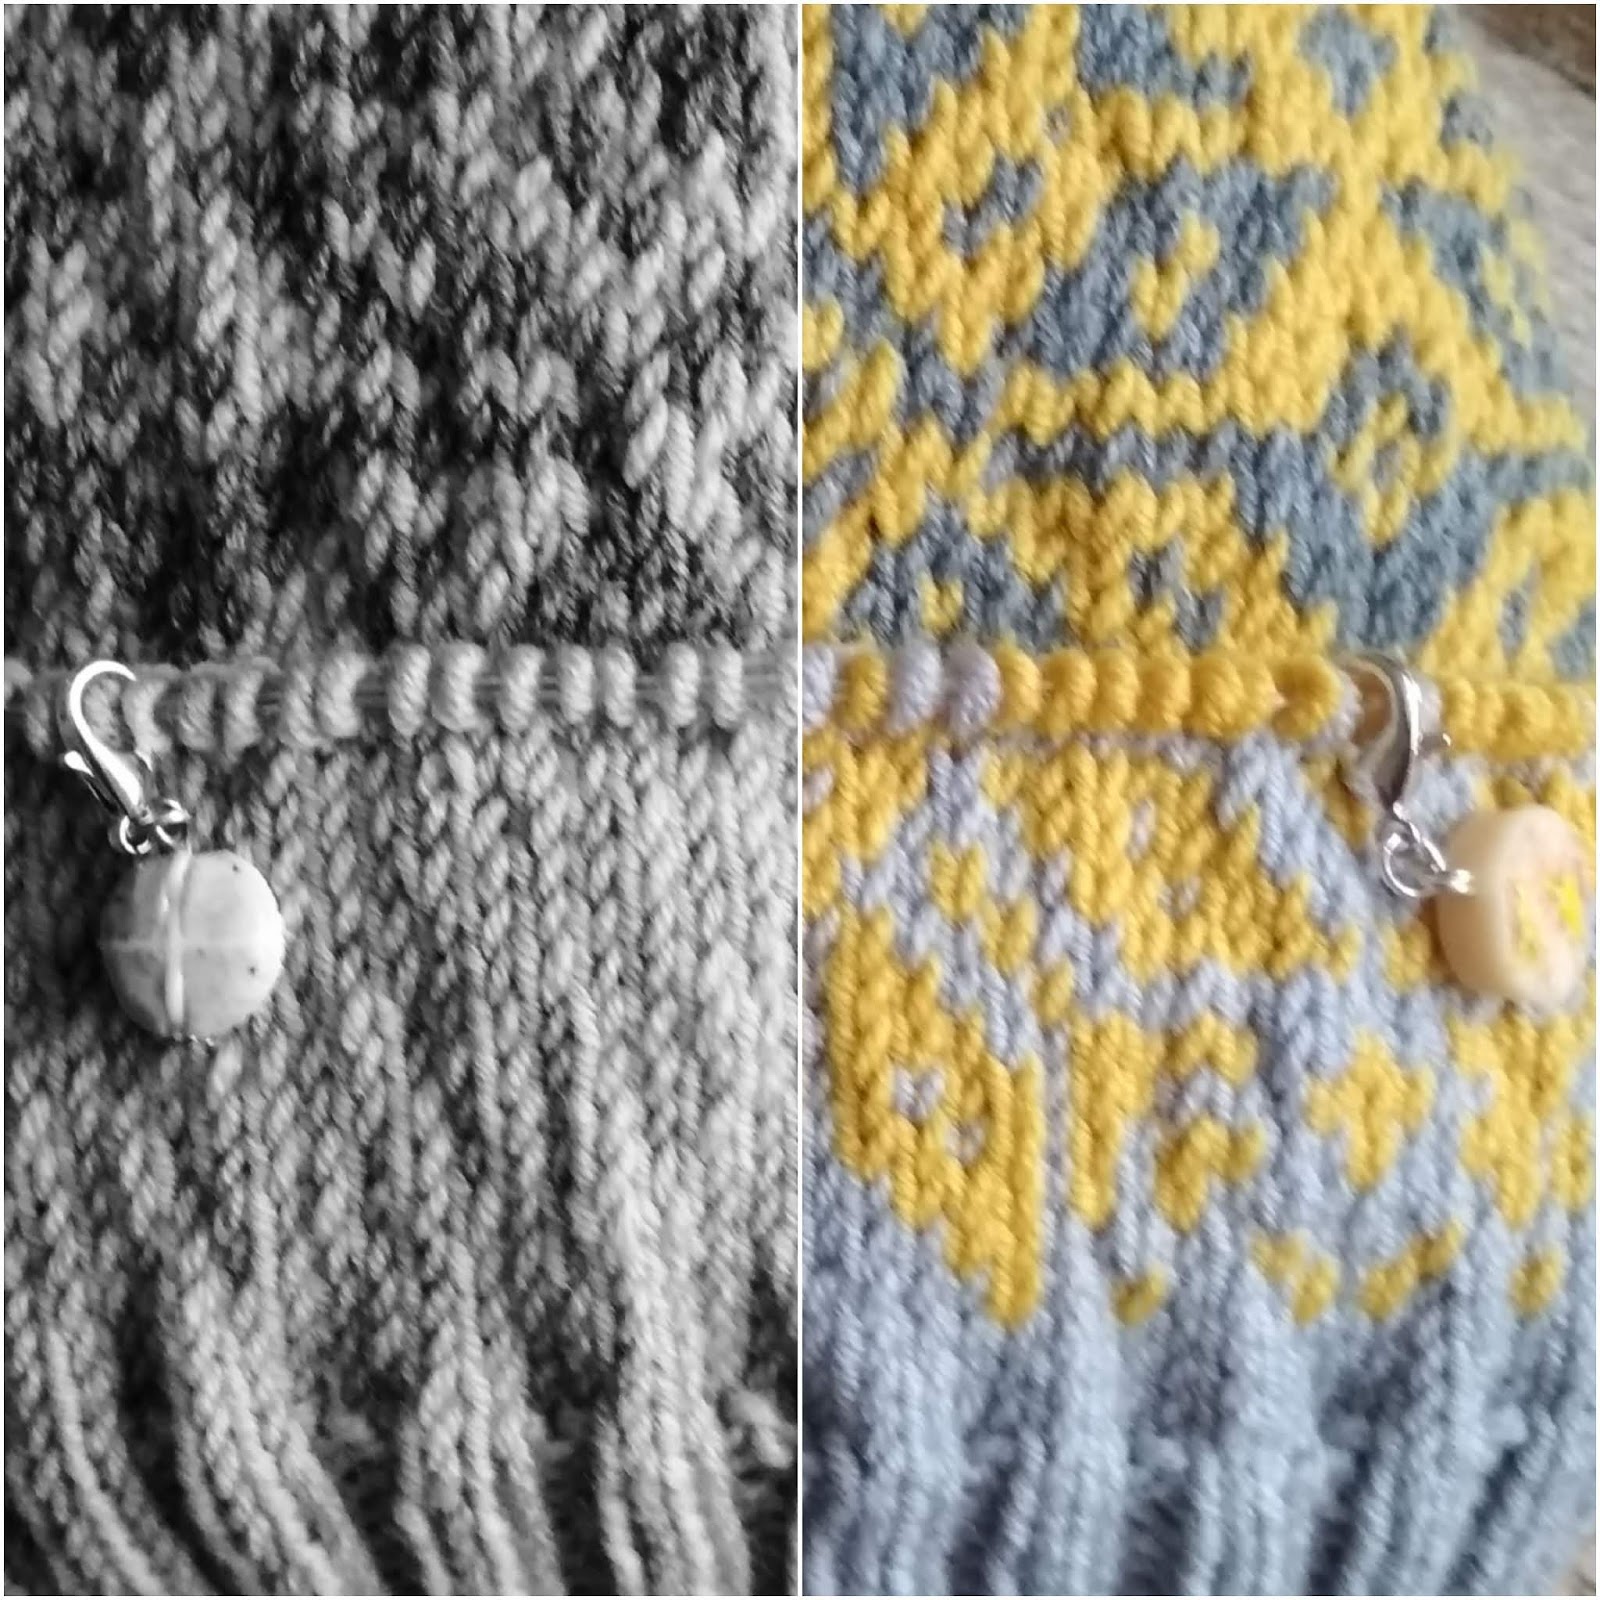
I had posted this pic on instgram, asking what people thought -

Tina's Allsorts

Someone suggested taking a photo in b&w as the contrast would show up clearly.

Tina's Allsorts

The difference is remarkable isn't it?? I would never have thought of doing that.
So yes, the mustard looked much brighter but just didn't work with the silver grey...

Tina's Allsorts

Back to the shop I went and bought a ball of cerise pink instead to use with the silvergrey. And I made sure I took a pic in b&w in the shop to check the contrast!!
I also decided to make another Baa-ble Hat, rather than the snowflake.

Tina's Allsorts

Much better!!!! Just wait til you see what I did next though!

Friday, 21 February 2020

Foray into Fairisle part III

If you've already seen my Foray into Fairisle parts I & II, you won't be surprised to hear that my 3rd project was a) another hat and b) featured the snowflake that featured on the cowl.
The snowflake had a 24 stitch pattern repeat, which would fit perfectly into the 120 stitches required for a DK hat. I also happened to have a ball of mustard yellow merino yarn that I had been itching to use. (I was hoping for a bright golden mustard when I ordered it online but it's actually more f an english mustard.)
I teamed it with a mid grey for the ribbing, although it might have worked better with a silver grey.

The pattern worked well as a hat but I now know that I held the dominant colour in the wrong position so it could have been better.... So I'm considering unpicking it either back to the rib and just reworking the snowflake (and adding 3 or 4 rows of plain grey before the snowflake starts), or I might unpick the whole thing and start again with silver grey! And I'm considering a long turn up brim too.

Tina's Allsorts, Snowflake Hat

I haven't quite decided what to do - but I'm very tempted to completely unpick it and start again with the ball of silver grey that I have now bought! Decisions decisions!


Thursday, 20 February 2020

Foray into Fairise part II

Following on from my last post, my next fairisle project was a bit bigger than a hat!
While  was still making the second Baa-ble Hat, I saw a pic of a gorgeous cowl decrated with snoowflakes, that moved from white on blue at the bottom, to blue on white at the top. Very clever and very effective! But I don't wear cowls... so I showed it to my friend and she said ooooooh!!! So I bought the pattern to make it for her!
This what I saw, the Midwinter Neckwarmer -


Isn't it absolutely STUNNING?!!!  Here's the link to the pattern -


It was made in 4 ply but I reckoned I could leave out a pattern repeat or two and work it in double knit. Wihout delay I went through my stash to see what I had and came up with some cranberry red alpaca (unpicked from a pair of crochet mittens that I never wore) and the silver grey merino I usedin the second Baa-ble Hat (it was a bit on the thin side and I thought it would work well with the alpaca).

I (foolishly) measured the tension on the Baab-ble hat and came up with an approximation of what my finished cowl might measure. I went for 5 pattern repeats instead of 7 and merrily knitted away, in what I still thought was the correct technique. But you know what? It wasn't quite the right technique...

Remember that link to Little Cotton Rabbits I shared last time?? Well, I should have gone back and re-read it myself before starting the hats...
I knew she had said you had to always hold the dominant colour in a certain postion to make those stitches stand out - but my memory of what she said switched them around... I held the dominant colour in the background position. But at least I did it all the way through! 
It also came out a bit on the small side... that's what comes from measuring tension on something that isn't reall'propeeer' fairisle - and is so small it doesn't really lay flat!
Tina's Allsorts, Fairisle Cowl

 If you look at the photo above - and you know what to look for, which I didn't... the second row of motifs looks like a red cross doesn't it? But the red should sit in the background...  See what I mean? But I didn't know that at the time, I thought I was doing it right and so merrily knitted on as I was quite enjoying the process.

Tina's Allsorts, Fairisle Cowl

This photo shows the main snowflake which changes from one colour to the other in the middle.  It also shows the row I was on is wrong, as it's almost all red stitches when it should have been grey stitches.... (And please excuse the feet! I should have cropped the photo!)

Anyway, I happily carried on, after unpicking that red row.

Tina's Allsorts, Fairisle Cowl

It's very clever, the way the pattern changes isn't it??

Tina's Allsorts, Fairisle Cowl

I knew by this point that I had made it too nrrow... and too long! But it was a 24 stitch repeat and an extra repeat would have added up to 4 inches. I thought I might as well finish so carried on and worked the final ribbed edge but didn't do the fancy cast off the pattern suggested as therewas a chance I might rip out a few rows to shorten it.
Here's the (initial) finished version -

Tina's Allsorts, Fairisle Cowl
 And the inside -
Tina's Allsorts, Fairisle Cowl


But as I've already said, it was too small... I could just get it on but it felt like a very close fit. For a cowl that could almost become 'clostraphobic'. I showed it to my friend and whilst she really liked the design, agreed it was too narrow and too long.
And I really didn't like my cast off top edge at all! So I ripped back all the rib and th top row of snowflakes. That would bring the width and length back into proportion at least and I hoped that some blocking would stretch it a bit.

But how to finish that top edge??? I decided to go for a simple reverse stocking stitch rolled edge, as there was a chance I would unpick it again and tackle the fancy ribbed cast off later.
And this is what I got -
Tina's Allsorts, Fairisle Cowl

A rolled edge that rolled - outwards!! Not just the edge rolled though but the top few rows as well... What to do? I decided that as I'd come this far, I might as well wash and block and see what that did.
With the blocking, I found a book that was the right finished width I was aiming for, popped it in a plastic bag to protect it, then stretched the cowl over it and left it to dry.

And it sort of worked!! There was definitely some stretch in the width, so it didn't feel quite so constrictive - but there was still that rolled edge that still rolled outwards...

Tina's Allsorts, Fairisle Cowl

I tried it on and realised, if I wore it upside down, the rolled edge would actually sit neatly against my collar bone, leaving the neater, cast on edge at the top.

Tina's Allsorts, Fairisle Cowl

I decided to leave it as it was and show my friend and see what she thought. And she was perfectly happy with it! (Thank goodness!)

Tina's Allsorts, Fairisle Cowl

So the moral of all this is, CHECK YOUR TENSION PROPERLY. If you guesstimate, you may guess wrong! And check which yarn sits at the top as you work. It isn't the dominant colour!
I have since read that because the yarn held underneath doesn't have as far to travel before it reaches the nect stitch, that a tiny fraction more yarn goes into the stitch itself, making it a fraction bigger than the background stitch, which helps it stand out. The background yarn has to cross over the dominant yarn before it reaches the next stitch, leaving a fraction less yarn to go into the stitch. Obvious when you know.

On the whole, I am happy with it and might even make another one day. Maybe even in 4 ply!!! 

But my Foray into 4 ply Fairisle is a whole different adventure!!! That is for another day.

Should you be thinking of trying fairisle yourself, I really would recommend reading Julie's tutorial first. I really wishI had re-read it raher than relying on a memory from several years ago! (She gives great tips on other aspects of knitting too - especially stitching things together.) And of course, there is a whole wealth of videos avaiilable online as well.

'Til next time!


Monday, 10 February 2020

Foray into Fairisle

Is there something you always wished you'd learned how to do but every time you try you're just rubbish? Well, for me it's knitting fairisle.
Not big patterned jumpers and cardigans, just little things like hats. (I don't have the patience for big knitting anymore..)

I fancied doing a spot of knitting back in January, so decided now was the time to try again. 4 or 5 years ago I came across the Baa-ble hat but hadn't actually dared make it. I hunted through my files until I found it (it's still available on Ravelry) and went through my stash looking for some nice merino in colours that worked well together.  It didn't help that the pattern was written for aran and I only had DK!

I also looked through some of the 10k projects that had been added to Ravelry, to see what other people thought etc. (It's always worth looking through other people's projects for their comments before you buy a pattern - sometimes you find a pattern sounds like it's badly written and you think twice before buying. Sometimes it's opposite and it's an amazing pattern.)
There were a couple who added extra animals to their version - a sheepdog and a llama! I thought I'd add both to mine.

I've read instructions on how to work fairisle in the past, so (gently) jumped straight in! I tried very hard to keep my tension loose when carrying the non-working yarn across the back. But, silly me, I was working with 3 colours per row at times. Those rows were rather tight...
But you know what? My hat came out reasonably ok. Not fabulous but ok.
I like a deep rib to help keep my ears warm, although that does mean my sheep sit further back when I'm wearing it.

Tina's Allsorts, Baa-ble Hat

Tina's Allsorts, Baa-ble Hat

Tina's Allsorts, Baa-ble Hat

Tina's Allsorts, Baa-ble Hat

Tina's Allsorts, Baa-ble Hat

These pics were taken after it had been washed and dried. That has the effect of evening out the tight and loose stitches, especially the vertical ridges you get by carrying your floats on the back. Can you see the grey llama in the second pic? And the black sheepdog in the 3rd? There are ewes, lambs and even a ram with curly horns! And you can see all my floats carried inside. See the section in the middle? That's where I had more than 3 colours working, and is tighter than the rest...
A friend saw my pics on Instagram and liked it,  so I made a second hat for her. This was actually an opportunity to practice my fairisle again!
She wanted a dark grey rib and silver grey top. I also tried to be good and follow the pattern properly by only using 2 colours per row. Not surprisingly, that helped my tension no end!
My friend has a Westie, so I swapped the llama for a little dog. I placed him one stitch out though, or he would look better...
The first pic is unblocked -

Tina's Allsorts, Baa-ble Hat
And this is the effect blocking has -

Tina's Allsorts, Baa-ble Hat


Tina's Allsorts, Baa-ble Hat

The faux fur pompoms really finishes them off!

Before I'd even finished my second hat I'd chosen my next, and more complicated, pattern. A snowflake cowl. More of that next time though.

Before I go for now, I'll just mention the Three golden rules of fairisle (in my humble opinion). I have learned these from Julie of Little Cotton Rabbits -

1  only use 2 colours per row
2  keeping the dominant colour in same position
3  carrying floats

But more on them - and links - and my mistakes... - next time too. 😊🧶🧶