

She has shared the pattern for the full motif free on her blog (link above). You will need to buy her pattern for the full instructions for the whole blanket - but it's worth every penny! Plus you will be supporting the designer, enabling her to be able to share more things for free as well.
And apologies if this page seems really jumbled - and talks in different tenses - and I keep repeating myself! It's very much a work in progress and I keep coming back and adding to it as I go along.
This is how mine looks so far - just a few more rows to go on the border. (It isn't really a funny shape! It just too big to get a picture of the whole blanket easily!!)

If you take a look at her page she gives full details of the CAL (Crochet A-Long) and the link to buy the full pat*tern, including how to make the half & quarter motifs, the joining triangles and the border. (The basic flower motif is free on her blog but if you want the full instructions, you'll need to buy it - but it's not that expensive and it's worth every penny. )
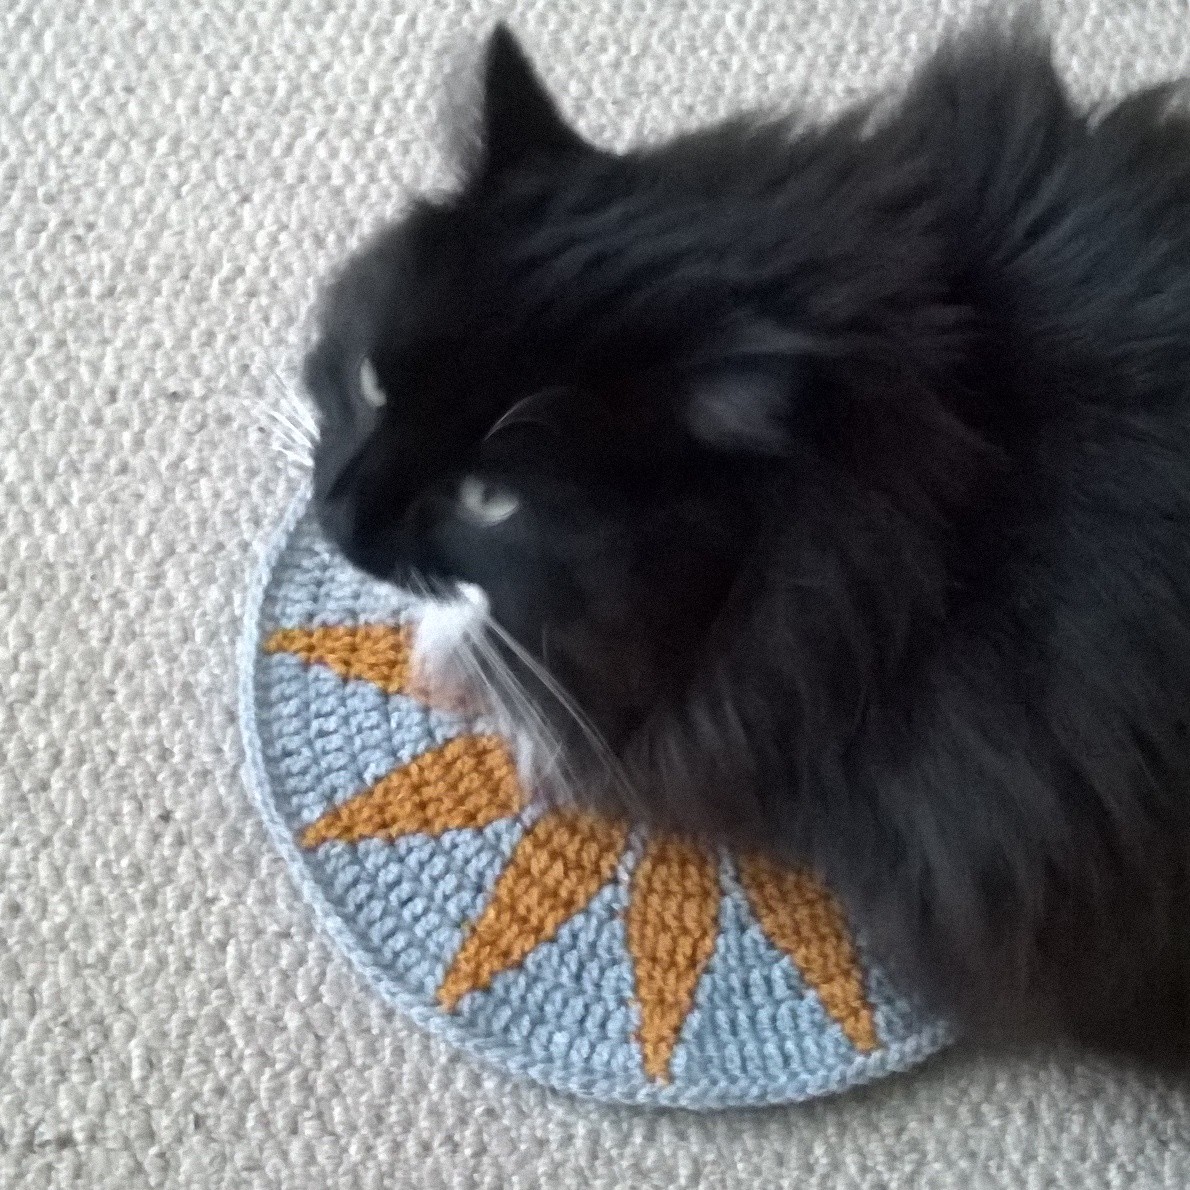
It's a lovely design and I'm really enjoying making it! I made this first one with some scrap yarn, just to see how hard/easy it was and before I could take a photo, Fluffy decided to test it for me -
Initially, I was going to choose a nice colour scheme and look for some good price merino yarn to make it - but I just couldn't settle on the colours! There are so many gorgeous designs around now I simply couldn't choose. (I have now seen one lady on facebook (I'm sorry, I can't remember who just now) who used 18 different colours for her motifs and placed them in a colourwash arrangement - every motif was different and she chose 10 of them to repeat as the half circles. It looked very effective too!)
So in the end I decided to use up all the Stylecraft scraps from my Tootyharmonyblanket and see how far I got. I think there might be enough, although some of the motifs may start to look a bit ugly as I run low on colours!!
There's no Lipstick red left for a start! Almost no Plum or Pomegranate. Not much turquoise.... or magenta.
Luckily, I had bought an extra ball of Sherbet and Candyfloss for something else, so did have a fair amount of them and I've added Pistachio into the mix too. And I gave in and bought more magenta because it looked so good against the sherbet! Look!! -


(Incidentally, my beautiful crochet hook is called Pedro and was made by Karen of Pedros's Plaques . He also has his own instagram page - @Pedroswoollyadventures, should you what to see what else he gets up to!)

And here's Fluffy again, inspecting what I've done so far!

This is what each motif looks like on the back.

And if you want to go wild, you can use LOTS of colours in each one! Here I've used 6 colours in the petals and 2 in the background.
I opted for a light silver grey as my background colour and set about working a row of it around the motifs I had done up to that point.
I had already made the decision to try and make all my motifs first and then see if a Join-As-You-Go (JAYG) method would work for circles, leaving little unworked triangles. That is, join them all one after the other without breaking the yarn, rather than just join them one at a time.
I lay the motifs I had made so far on the floor and ran a length of yarn around them to see if I could work my way up and down the blanket, without crossing, or missing any gaps other than the triangles - and it looked like it would work!! I'm really hoping I can include all the half and quarter circles in the same manner.

But what stitch to use when I join them??...
I tried a simple double crochet join on a small section to see how it looked but it was ugly and lumpy! So I ripped it out and worked it from the back instead. Much better - flattish on the front but still with an ugly ridge on the back... This first pic is from the front -


And this is the back but from further away so you can see the triangular space that appears -

Then I saw someone else (Robyn of 3Littlespears) who had made "granny triangles" to fill the gaps rather than solid triangles and I really liked the look of them!! It was the light bulb moment where I realised that I actually wanted more light and space between each flower motif and that a granny stitch join and filler triangle might work.
I hooked up this little sample with the granny stitch join and then tackled filling the triangular space. I tried several times and after quite a bit of playing around, I came up with this - a little different from Robyn's version, and not my final version either, and completely different from Sandra's original triangular filler.

You still have to go back and fill in each triangle separately after the flower motifs have all been joined though - although I'm still wondering if there is a way to do it all in one!!
However, I did realise I'd made a bit of a mistake with my DC row around the motif. There are 10 background stitches and 1 petal stitch in each segment on the final round - that's 11 stitches in total but granny stitch is worked into every 3rd stitch... If you look carefully at the picture above, you can see where I had to leave one stitch between two of the grannies ,instead of two, between each of the petals. I didn't think of that when I edged the first 12 motifs ... but I did it for the rest!
I did, however, think to work a half treble into the petal stitch rather than a DC. You can see in the pic below that (probably due to my tension ) there's a dip at the tip of each petal -

And this pic shows how I smoothed out that edge. The petal tips have a treble crochet, plus, either the 5th or 6th background stitch has 2 DC's rather than one, to give a total of 12 stitches from petal to petal .

Another thing I didn't think of was that I would need to work the row of DC all the way round the half (and quarter) motifs....

EDIT: This is really important and I'm sorry if you've decided to try my joining method yourself and have already gone past this point..... You see that half motif in the photo above and the row of DC all the way round?? When you come to work a row of granny trebles into it, if you space them nice and evenly, you will get 17 granny trebles along the straight edge. BUT... when you then come to sit my granny treble border on top of the straight edge, you will have too many grannies and it won't lie flat but will start to ripple.
There are 2 options I think to correct this neatly at this stage (I didn't realise until I was on the border and my correction is just plain ugly!). You will need to reduce the number of granny clusters by two from 17 to 15 on the straight edge of each half motif. The simplest way is to work fewer DC to begin with. The other way, would be to space the grannies out a little more on the join-as-you-go row.
When I worked my DC row on each half motif, I worked one into each stitch on the curved edge, as with the full motifs (with the increase in the centre stitch to give a total of 12 between each petal). When I got to a corner, I worked 3 DC into it, then along the straight edge I worked 2 DC into the edge stitch of each row. I also wanted to place a granny right in the centre starting stitch of the edge, so worked a DC decrease that straddled the centre join.
HOWEVER, I now realise that as I was working those 2 DC into the edge stitch of each row, I should have also done a DC decrease on roughly every 3rd row - a perfect granny lineup will need 43 stitches in total. That will include one stitch right at each end, plus the one in the centre. I'll sketch this out later and add it so you can visualise what I mean.
Update : I have now made all 18 full circles - and run out of candyfloss pink in the process - and have started on the 10 half circles. Slowly....
Take my advice - do not leave all the half circles till last!!


As I was using my stash yarn, I really didn't plan my colour layout at all before I started - I just dived in!! Once I was 12 motifs in, I'd had a little play around laying them out this way and that (see the pic with Fluffy above!) and it dawned on me that I had subconsciously created two colour families - pink/blue/mauve/aqua and green/pink/mauve.
After much playing, I decided the best plan was to look at the layout of the diagonal rows. In one direction, one whole row is in one colour family, the next row is the other family. At the same time, on the opposite diagonal, the 2 families alternate along every row. Below is my final layout showing the colour family rows (apologies for the rubbish lighting) -

Then I properly planned the colours for the quarter motifs to make sure they fitted in just right!
It was a lovely sunny day, with sunlight streaming in the windows and when they were all done and laid out together they looked just fab. Absolutely FAB!!! (Unlike the picture above, when I finally got round to taking it...)
I was so pleased! There had been a point where the colours just weren't working for me but a very kind lady sent me a couple of balls from her stash to help me along, plus I found a ball of something that wasn't Candyfloss by Stylecraft (pale pink) but was a close substitute, in a bag I'd flung in the corner that I was able to use in the halves and quarters. So in the end, it all came together really well.
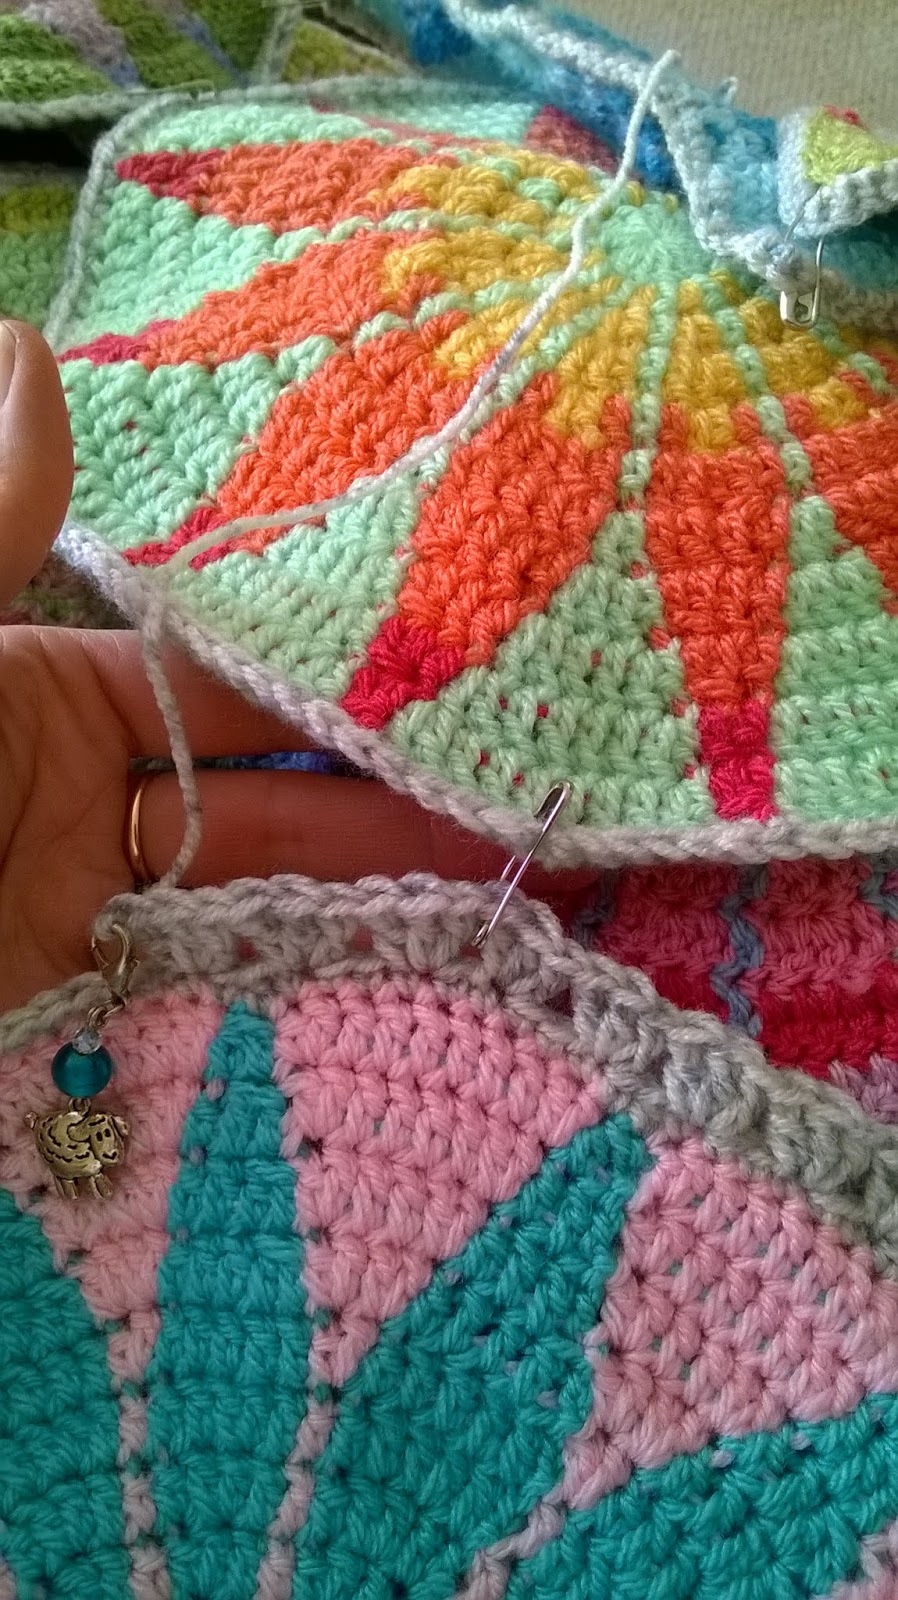
Once the layout was decided, I "pinned" everything together ready to Join-as-You-Go. I could have labelled them and pulled each one out of a pile as I needed it but I went for pinning so there was no room for mistakes! I used to be a quilter and still have loads of quilters safety pins, so used one between each pair of petals where two motifs would be joined. you can just see them in this picture -


Then I was ready to start joining everything!!! Woop woop woop!!
Have you ever heard of the Join-As-You-Go method?? If not, you're in for a treat!! Years ago, I made a blanket from hexagons and spent a very long time crocheting them together one by one and sewing in a million ends. Then a couple of years later, I heard about this technique and realised I could have save myself SO MUCH TIME!! I initially saw it on Solvieg's blog and her flowers in the snow blanket. She has a tutorial which she has recently updated I see, with English instructions (she's Norwegian). When I first saw it, it didn't quite work for my project (she works the corners a little differently), so I searched further and found this tutorial by Sandra of Cypress Textiles -
https://babylovebrand.net/2013/08/27/continuous-join-as-you-go-again/
Looking for this link, I see she has also now updated hers because she said it is apparently the most popular tutorial ever for this joining method! It is amazing and well worth learning and she explains it so well. Once you've tried it with squares and got the hang of it, you can then use it on other shapes too. And it will work with the Marguerite Motif as it is actually a dodecahedron (12 sided) not a circle (although my "route planner" below shows circles).
I needed to work out a "route" around my motifs so every stitch would be joined in but I wouldn't try and go over anything twice.
I'd printed off Sandra's colouring sheet and put it in a plastic sleeve, then used a marker pen to draw round the motifs in a long line - again and again until I got it right. Then I realised I'd started at the wrong edge and was drawing my line left to right, when it should have been right to left! (If you're right handed, then you crochet from right to left...) So I've switched it round in the pic below, not that you'd know! You start at point A, and finish at point B.

Sooooo..... here's how I joined all those glorious motifs together! It's a bit of a fiddle turning the blanket this way and that but you soon get into the swing of it.
I'm going to try and use pictures far more than words to describe what I did (I'll come back another day and actually add the words!) - and hopefully you are either already familiar with the JAYG technique, or have looked it up and taken in all the info about it. Here we go...

I should have taken a pic of exactly where I started to join - but I didn't.... The above pic was when it was all joined. Oops - and I should have thought to rotate the pic 90 degrees to the left. Double oops!
But it was with the bottom right hand corner motif, just to the left of the right hand petal tip - not at the corner but one petal space in from it, at point A. You need to work a regular granny stitch (that is, 3 trebles in the same stitch), with 2 skipped stitches between each granny. I have also skipped the stitch directly above each petal, along with the stitch to the right of the tip.
I like to start with a "standing stitch" but you are welcome to start with a slip stitch and 3 chain stitches if you prefer.
 Work grannies along the curve until you meet the left hand edge, (I only worked 2 trebles into the end stitch) then "hop across" to the next half motif and work around it's curved edge (the red arrows), using the join as you go method to join the first petal space to the first half motif. Then join the third one and so on. You will need to have the blanket piled in your lap so you can keep turning it this way and that, as you work back and forth across the rows, gradually joining as you go. When you work back across the row, it will be where the blue arrows are shown on the picture above. The green arrows are the final step of the JAYG, when I went along the bottom edge of the blanket, finishing by turning the corner back onto the very first motif and working that first petal space, finishing at point B. (I will come back later to add the captions, honest!)
 |
| 1. |
 |
| 2. |

 |
| 4. |
 |
| 6. |
 |
| 7. |
 |
| 7a. |
 |
| 8. |
 |
| 9. |
 |
| 10. |
 |
| 11. |
 |
| 12. |
 |
| 13 |
 |
| 14 |
 |
| 15 |
 |
| 16 |
 |
| 17 |
And here are some couple of pics from "the edge"! First, the long side edges where you placed all the half motifs. (They're the easy edges to do!!) DON'T FORGET - check your stitch count with your grannies on that straight edge. See the highlighted notes above.
 |
| On the half motifs, you will work the granny edging on the curved edges, and will come back and do the straight edge later. Look closely - the last stitch on the curved edge has 2 trebles rather than 3. |
 |
 |
And then there's the short edges. With those fiddly half triangle spaces. As above, the corner stitch has 2 tr, 2ch, 3 tr BUT - see my note highlighted above about the number of grannies to work along the straight edge!
|
Filling in those half triangle spaces proved to be a right phaff!!! I still wanted to use a granny stitch so they wouldn't stand out as being different but I didn't come up with anything I was completely happy with.
The best method was to try and work a 2 row filler, as it filled the space better - but would be very hard to explain to someone else... So I filled them all in, stood back and looked and realised there was a "dip" above every full motif along the edge. After much head scratching, I could see the problem. If you look carefully, especially with the help of a couple of rulers, the problem is obvious. Each half motif has a row of grannies that goes all the way round - a row on the bottom curved edge and a row on the top straight edge. Whilst the full motif - if you lay a ruler across the middle - only has a granny row across the top. So there would then be a dip. About the depth of a missing granny row...
 So ideally, the half triangles needed to be worked in such a way that they were linked to each other by a line of grannies across the top of the full motif.
So I unpicked some of them (I'd stitched all their ends in too...) and tried a different version that included the "linking" grannies. At the outer edge of these triangles, where there was more space to fill, I tried working double trebles rather than trebles. It sort of worked but is a little gappy. And is also very hard to explain how I did it. I'm still working on how to write/describe that.... (The others got "fudged" by adding a few grannies in that gap!!)
As and when I work out a better half triangle filler, I'll come back and add it - but if you've got this far, hopefully you can work out something of your own. Sorry....
As you can probably tell, I've been having trouble placing my photos where I want them on the screen...
So I spent 3 hours putting together the following photos to show how I filled in the triangle spaces and saved them as a pdf file. Only I can't quite work out how to add it here.... So the following are screen shots of that pdf, which I could save as pics. Which means I've lost all the resolution....
Hopefully they make sense enough that you can follow them though!! The filler triangle I came up with is also join-as-you-go, just two rows starting at the outside edge of each triangle space and working in towards the centre. I have made them all to match my background colour, although if you look at the last pic you'll see it's possible to work the second row in a contrast colour as it makes a flower shape!!
And I warn you, you will need to have the blanket piled in your lap and keep turning it round and round. And round...


Now. Did you read that important note way up the page when I was talking about working a row of DC around the half motifs and how many to work along the straight edge?? You didn't? But I mentioned it twice! Well, go back and read it! It really is important if you want your border to lie flat and not ripple.
Ideally, on this first row of the border, your stitch count will be correct so no adjustment will be needed - unlike mine, where I had to try and decrease the number of my grannies per half motif, resulting in an ugly bump. Don't do that on yours.
My border is nice and deep and consists simply of granny stitch. I started in a corner and I turned the blanket on every row, with 3tr, 2ch, 3tr in each corner space. (I need to add a photo I know!!)
The second row has every second set of granny stitch worked in a contrast colour to compliment the blanket - I used magenta. It was my favoruite colour in the blanket and I was confident I had enough left. I then carried on to work a further 8 rows of granny stitch and finally added a simple edging as follows - DC between two grannies, ch4, repeat. In each corner, I worked (DC, ch4, DC)
I did a little bit of steam blocking here and there (steam blocking works a treat with acrylic yarn but your chosen yarn might work better with wet blocking) to make sure the corners were "square" and to make the granny join between motifs lie nice and flat and not form a slight ridge.
(If you look carefully at the photo below, you can see that the very edge is a paler shade that the rest of the border. That is simply because I didn't buy enough yarn in the background colour (I used over 600g in the end!) and when I bought more in another dye lot, I realised it was very different. But I think it just adds a certain something rather than spoil the blanket.)
And that's it! Finished!! Take lots of photos, then snuggle beneath it!!

This is spectacular! Thank you for sharing your version of her pattern. You should be proud!
ReplyDeleteReally grand afghan. Love the way you did the corners.
ReplyDeleteThank you for all this info I am just beginning this CAL and found out 8 cannot find part 4!of the CAL do you have it !? Pls let me know and thanks again about the steps you sido to join on your way through . Best regards Elda
ReplyDeleteiniziocoe@gmail.con
Hi Elda,
DeleteI'm afraid it's a long time ago and I don't quite remember!
I'm sure I purchased the complete pattern on Ravelry in order to support the designer.
Can I suggest you look either on Ravelry, or the designer's blog for more info? I think there was a Facebook support group as well that you could join.
Hope that helps?
Best wishes, Tina