OK. That heading isn't actually true! I thought it was when I started downloading all the incredible sunset photos I've taken over the past month but when I checked the dates I found that some were taken in July and August as well as September (it doesn't feel like that long mind...). But September sunsets sounds better than July, August and September sunsets!!
I am blessed with living in a house on the side of a hill that faces west, so I get to see a lot of absolutely incredible sunsets. I only normally see the sunrise in December when the sun doesn't come up until around 8am and I see it from the car as I drive to work. Some of those are also pretty spectacular but I can't take a photo while I'm on the motorway!! So I'm a sunset girl.
Anyway, here are some of the best sunsets I've managed to capture recently - enjoy!
Saturday, 30 September 2017
Sunday, 10 September 2017
Harmony blanket progress
Where did those 2 weeks go? Seriously - where? I'd swear I was only here yesterday!
There's been a lot of blankety progress in those 2 weeks though. I'm losing track of how many projects I have on the go to be honest but you can never have too many WIP's really can you. Can you??
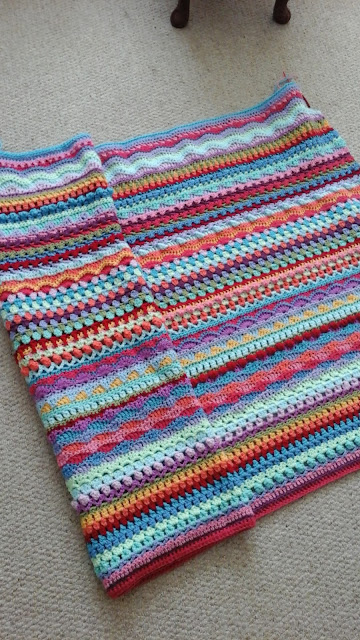
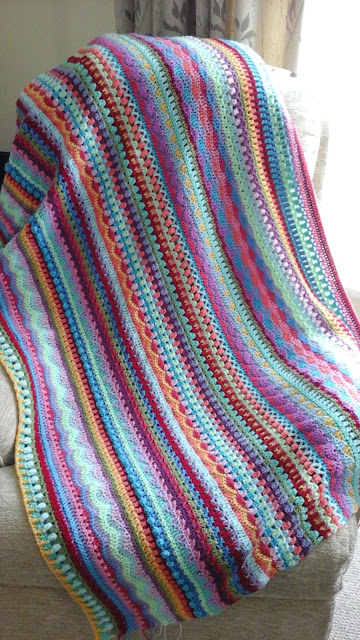
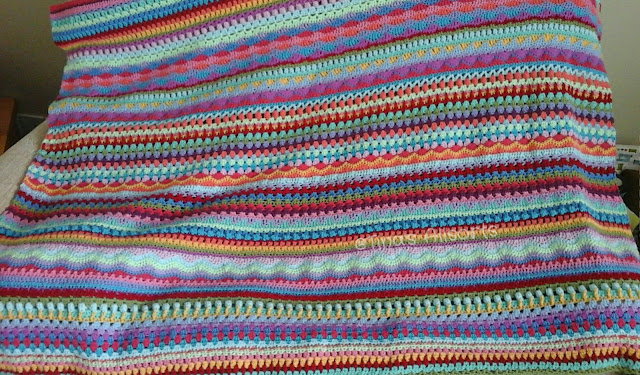
I've worked my way right through the whole pattern for the Tooty Harmony Blanket (and corrected any errors I found on the original and uploaded it) and I've gone back to row one to repeat the pattern. Its going to be HUGE - it's already 54" wide x 37" long! I must order some more yarn soon...
It's lovely and warm and if I do say so myself has the most delicious texture. It's wide enough that if I lay it lengthways it covers me from toes to tits while I work on it!! Want to see?? (The blanket not my tits...)
At the same time, I've been bobbing back and forth with both Harmony Baby Blankets. One has been joined with cream already and the border begun. The second baby blanket is currently being joined - but with colour!
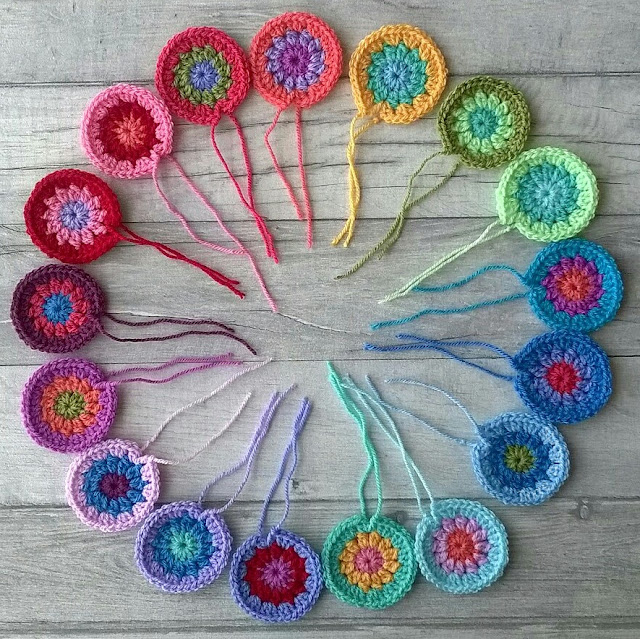
Here are some "in production" shots. I think I've said before that I'm following Lucy's colour recipe exactly up to round 3 of my 102 circles. I was very well behaved whilst working rows 1 and 2 and stitched every single end in as soon as I cut the yarn. Then I got excited as I began round 3 and started to see the magic appear. It takes as long to stitch in the 2 ends as it does to whip round the outside with round 3. So I whipped round all of them without stitching in a single end.... When you look at the pic below, remember, every single circle has 5 friends, and they all have 2 ends. That's 204 altogether. ..
I decided I quite liked the arrangement of the set on the right and threaded them all onto a length of yarn ready to join, using the join as you go method. Just after taking the pic below I stopped for dinner. When I came back I merrily carried on, eager to finish that evening. It wasn't until I was joining the last but one circle that I realised I'd gone wrong somewhere and it wasn't quite what I'd planned....
I decided as I was so close to the end I'd carry on and finish and then think about it, ask opinions etc. Only I didn't quite make it to the end before this happened -
In the woolly world this is called playing yarn chicken - and I lost!!! Luckily, tucked out of sight is a starting end which was long enough to save the day! Want to see it all joined without the border, albeit not in the arrangement I was aiming for?
After much thought and opions from friends at work, everyone (except one lady) was happy with the arrangement and all thought I should leave it as it is. So I have and am now working on the border.
At the same time, I've also been planning and making blanket number 2. This one is being joined with colours for round 4, not cream and will also have a colour border. In effect, it is a miniature version of Lucy's Summer Harmony Blanket.
Lucy has an amazing eye for colour and was able to visualise how her blanket would look as she planned her fourth row by laying a scrap of yarn next to each square. I wasn't so sure of my skills but had a sudden brainwave! I went on Wool Warehouse website (other sellers are availble!) and copied the image of each yarn sample. I pasted them all into a document, printed it out and cut them up into little squares. I arranged these with yellow/green in the centre, then the aquas and light blue/mauves, with the darker pinks, mauves, reds, plum and turquoise right round the outside. Then I spent ages playing wooly Sod-u-n-Co (Sudoku) until I was happy. I had some "help"...
I threaded everything, paper squares included, onto a length of yarn so I could just grab a circle and know exactly where to place it and what colour to join with.
Iogether SO FAST!! I love this method of joining and can't recommend it highly enough - it really is worth learning how to do it. The following shots show one row joined, then two and then 3!!!
Prior to last week's group, I'd done a bit more research on "how to teach someone to crochet", as that is what most of the members seem to come for. Not to knit and natter. Not to crochet because they can already. But to learn to crochet. Quite a scary prospect when you've never taught anyone before...
So anyway, this time with my research I came across someone who suggested having a small sample piece for the student to start with, so they can get the hang of holding the hook and yarn, pulling through a loop and making a stitch, then another and so on, without having to worry about how to make a chain and work a foundation row, making turning chains and so on. We can do that next week.
And you know what - it worked a treat!! I started a tiny sample in rows, another in a circle, plus a granny square and the newest lady was able to try them all and got on really well.
I do now feel guilty about the first member who also wanted to learn to crochet, as I showed her - no, made her - do everything correctly from scratch... Sorry Elizabeth...
She's come on a treat though and has developed a lovely even tension - that's the hardest part of crochet. Tension.
Another lady said she had paid for an intensive one to one 2 hour lesson with someone and didn't get far at all as there was just so much to take in - it was just one lesson, not a course. She very kindly said she had learned far more with me and felt like she was actually getting somewhere now. And she is too!!
I do also have a little knitting project on the go. I was asked if I could make a Gromit tea cosie to fit a two cup pot. I hunted out the pattern I had for a 4 cup pot and wondered how I could make it smaller without fiddling about with it. I decided to use aran yarn on a small needle and follow the pattern without any alteration and thank goodness it worked! Here are the "body parts" ready for stitching up. It will need a little stuffing in places too.
I've made a separate lining as well, as that will not only help the cosie to fit really well, it will keep the tea red hot!!
And finally for today, look at this caterpillar that my Dad found on the patio. I think it's an Elephant Hawk Moth catepillar and as you can see, it was pretty big!! I hope he manages to transform into a beautiful moth... The caterpillar not my Dad!
See you again soon, T xx
There's been a lot of blankety progress in those 2 weeks though. I'm losing track of how many projects I have on the go to be honest but you can never have too many WIP's really can you. Can you??
I've worked my way right through the whole pattern for the Tooty Harmony Blanket (and corrected any errors I found on the original and uploaded it) and I've gone back to row one to repeat the pattern. Its going to be HUGE - it's already 54" wide x 37" long! I must order some more yarn soon...
It's lovely and warm and if I do say so myself has the most delicious texture. It's wide enough that if I lay it lengthways it covers me from toes to tits while I work on it!! Want to see?? (The blanket not my tits...)
Here are some "in production" shots. I think I've said before that I'm following Lucy's colour recipe exactly up to round 3 of my 102 circles. I was very well behaved whilst working rows 1 and 2 and stitched every single end in as soon as I cut the yarn. Then I got excited as I began round 3 and started to see the magic appear. It takes as long to stitch in the 2 ends as it does to whip round the outside with round 3. So I whipped round all of them without stitching in a single end.... When you look at the pic below, remember, every single circle has 5 friends, and they all have 2 ends. That's 204 altogether. ..
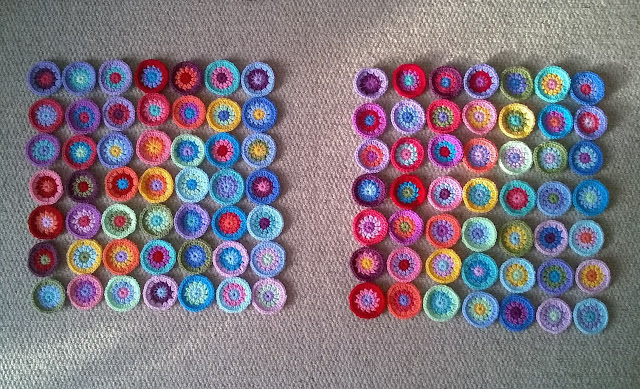
But they didn't really take that long to stitch in afterwards and then I got down to dividing them into two sets of circles and arranging them ready for joining. Here's my first try.
I decided I quite liked the arrangement of the set on the right and threaded them all onto a length of yarn ready to join, using the join as you go method. Just after taking the pic below I stopped for dinner. When I came back I merrily carried on, eager to finish that evening. It wasn't until I was joining the last but one circle that I realised I'd gone wrong somewhere and it wasn't quite what I'd planned....
I decided as I was so close to the end I'd carry on and finish and then think about it, ask opinions etc. Only I didn't quite make it to the end before this happened -
In the woolly world this is called playing yarn chicken - and I lost!!! Luckily, tucked out of sight is a starting end which was long enough to save the day! Want to see it all joined without the border, albeit not in the arrangement I was aiming for?
After much thought and opions from friends at work, everyone (except one lady) was happy with the arrangement and all thought I should leave it as it is. So I have and am now working on the border.
At the same time, I've also been planning and making blanket number 2. This one is being joined with colours for round 4, not cream and will also have a colour border. In effect, it is a miniature version of Lucy's Summer Harmony Blanket.
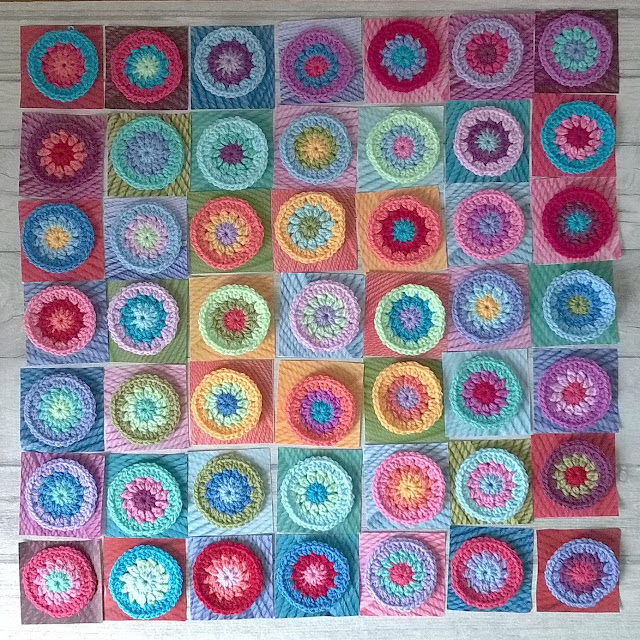
Lucy has an amazing eye for colour and was able to visualise how her blanket would look as she planned her fourth row by laying a scrap of yarn next to each square. I wasn't so sure of my skills but had a sudden brainwave! I went on Wool Warehouse website (other sellers are availble!) and copied the image of each yarn sample. I pasted them all into a document, printed it out and cut them up into little squares. I arranged these with yellow/green in the centre, then the aquas and light blue/mauves, with the darker pinks, mauves, reds, plum and turquoise right round the outside. Then I spent ages playing wooly Sod-u-n-Co (Sudoku) until I was happy. I had some "help"...
I threaded everything, paper squares included, onto a length of yarn so I could just grab a circle and know exactly where to place it and what colour to join with.
Iogether SO FAST!! I love this method of joining and can't recommend it highly enough - it really is worth learning how to do it. The following shots show one row joined, then two and then 3!!!
If you'd like to give it a try yourself, then this is where I found the best instructions by Rachele (in my opinion). (Incidentally, it wasn't til I just went to copy this link and checked her name, that I realised I follow her on Instagram under the name Cypress Textiles - she's Very talented!) The diagram below is the order in which to thread your circles onto a length of yarn ready to start. Don't be daft like me and try and do it from memory - print a copy, or draw your own and GET IT OUT when you get to the threading stage. It will save a whole lot of tears!!
But I can't stop myself trying something new as well. It's only a little something. Not an actual WIP. Not yet but I have a plan.....
One of the ladies at Knit'n'Knatter/Crochet'n'Chatter has been teaching herself to crochet and came along for a little help. She was starting a C2C blanket (corner to corner - worked on the diagonal, starting in one corner) using a lovely dark grey yarn. It will be made from smaller squares, each with a fox head motif in a contrast colour. She'd found a you tube video that showed how to do it but hadn't found and printed any instructions. I'd never made one myself, although I've seen lots of pics of finished blankets, so wasn't able to help her at all unfortunately. She should be back tomorrow, so I thought I'd better do a little research and find a pattern and have a little go.
Once you get the hang of it, it's really quick and easy. I even managed to work out for myself how to stop getting wider on every row, then how to decrease. I made just a little square to start with but I'm thinking it might look very nice in the chunky yarn we had in at the shop recently. It's a variegated yarn that's supposed to knit up like faux fairisle but has quite wide plain stripes too. The colourway I like has light mossy greens, mauve, light brown. In fact, it would go very nicely in the front room and I'm thinking of making a little throw with it - I could make it while I'm at work and it's quiet.
Would that count as another WIP if I only work on it at work??... No, I didn't think it would either!!
Prior to last week's group, I'd done a bit more research on "how to teach someone to crochet", as that is what most of the members seem to come for. Not to knit and natter. Not to crochet because they can already. But to learn to crochet. Quite a scary prospect when you've never taught anyone before...
So anyway, this time with my research I came across someone who suggested having a small sample piece for the student to start with, so they can get the hang of holding the hook and yarn, pulling through a loop and making a stitch, then another and so on, without having to worry about how to make a chain and work a foundation row, making turning chains and so on. We can do that next week.
And you know what - it worked a treat!! I started a tiny sample in rows, another in a circle, plus a granny square and the newest lady was able to try them all and got on really well.
I do now feel guilty about the first member who also wanted to learn to crochet, as I showed her - no, made her - do everything correctly from scratch... Sorry Elizabeth...
She's come on a treat though and has developed a lovely even tension - that's the hardest part of crochet. Tension.
Another lady said she had paid for an intensive one to one 2 hour lesson with someone and didn't get far at all as there was just so much to take in - it was just one lesson, not a course. She very kindly said she had learned far more with me and felt like she was actually getting somewhere now. And she is too!!
I do also have a little knitting project on the go. I was asked if I could make a Gromit tea cosie to fit a two cup pot. I hunted out the pattern I had for a 4 cup pot and wondered how I could make it smaller without fiddling about with it. I decided to use aran yarn on a small needle and follow the pattern without any alteration and thank goodness it worked! Here are the "body parts" ready for stitching up. It will need a little stuffing in places too.
I've made a separate lining as well, as that will not only help the cosie to fit really well, it will keep the tea red hot!!
And finally for today, look at this caterpillar that my Dad found on the patio. I think it's an Elephant Hawk Moth catepillar and as you can see, it was pretty big!! I hope he manages to transform into a beautiful moth... The caterpillar not my Dad!
Subscribe to:
Comments (Atom)


