A rather belated Merry Christmas to you all!
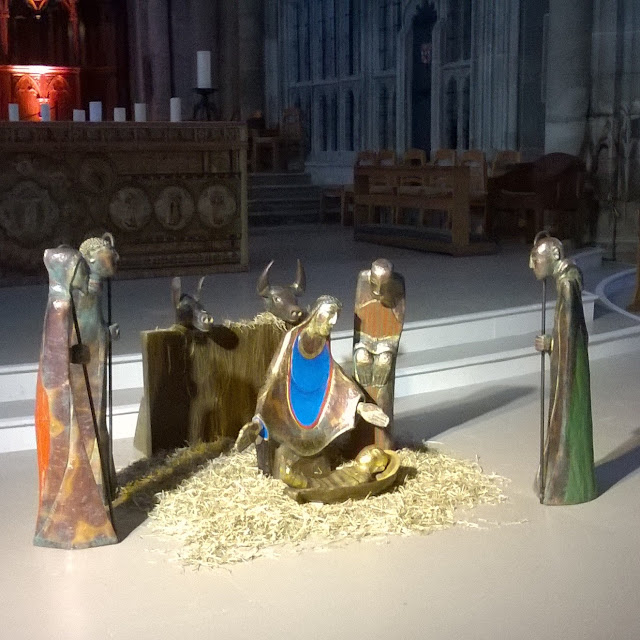
I thought I would share a couple of photos I took this morning in the Cathedral when I arrived for work before we opened to the public.
Thursday, 27 December 2018
Sunday, 9 December 2018
Hats!
I've been suffering recently with frozen shoulder and crochet seems to aggravate it, so I've found myself doing a bit more knitting. But impatient me wants it finished NOW, so I've gone for hats as they're pretty quick to make .
I came across a lady via instagram who designs the most amazing hats. She's Irina of @myknitland and sells her patterns through Ravelry. (Sorry, my tablet just won't copy and paste links anymore...)
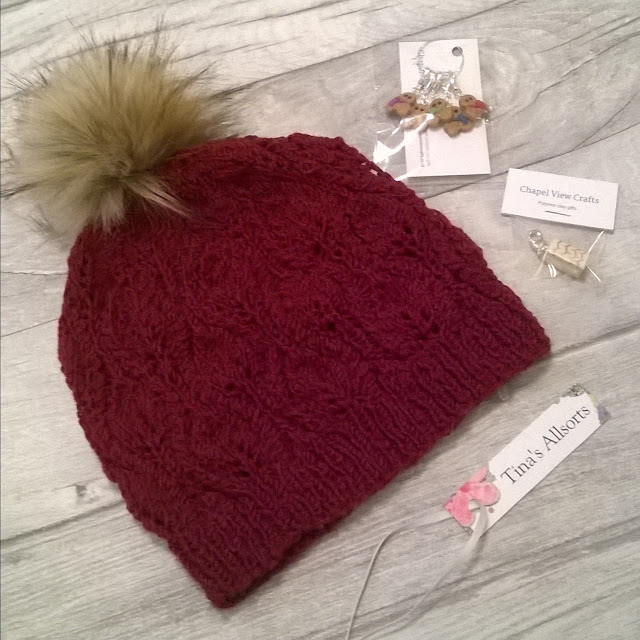
One of them is free - Foliage - and I made it last Christmas but it came out too big. My fault for changing the needle size. I finally got round to unpicking it and making it again in a lovely burgundy yarn.
I should have taken the time to "relax " the yarn before using it again though ,as when I washed my remade hat it turned out to have a bit of give, so is still too big!!
Never mind. It's a lovely pattern and I would recommend it - along with her others.
Next I made a complicated design called Flame. I used Drops Puna, a pure alpaca yarn and it turned out just right!
Just look at the top of the hat in the second picture - so clever. All I need is a freezing cold day as this one is going to be really warm!
I decided I might have time to make a hat for a friend for Christmas, so chose another design called Crystal. This one turned out to be even more complicated and is quite a challenge!
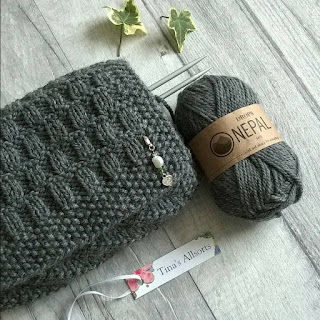
I'm using the same grey yarn again , even though it looks a different colour in the photo, and you can see my cute stitch markers too. They're made by Cheryl of Chapelview Crafts and they're simply amazing. Hand made little gingerbread men, all with different colour scarves. I also bought a pair of gingerbread men earrings!
But anyway , the hat. I'm determined to finish it and the pattern is going to look fab when it's done. Hope my friend likes it...
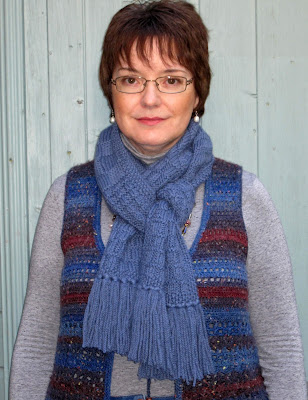
And here's the scarf I've just finished and posted off to the USA. My customer wanted tassels on it and they turned out really well. This pat*tern used to be called "Parterre" but has been re-branded the Texan Muffler. A much better name I think.
Available to buy on Ravelry - just follow the link on my shop page or in the side bar.
That's all for today . I thought a quick hello was preferable to not popping in for another month! Hope your Christmas shopping is going better than mine - ie barely started and as I was told yesterday, there's only 15 days to Christmas!
Take care, T xXx
Saturday, 24 November 2018
Ginkgo's...
We are blessed with having several Ginkgo trees in the Cathedral grounds and surrounding area. It was obviously a popular tree to plant at one time.
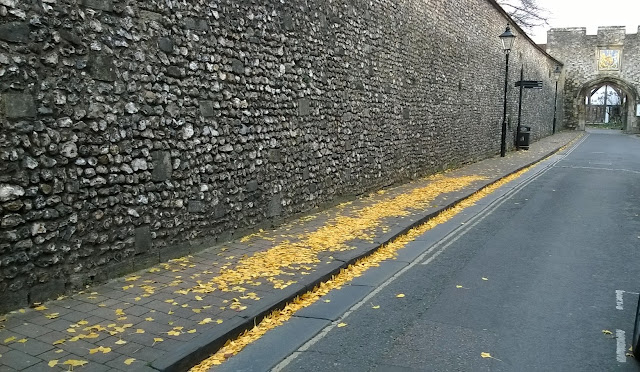
I love to see them in the autumn when their leaves turn to a bright shimmering gold. They often collect on the pavement just outside The Close where the wind catches them and arranges them in "channels". There was no sunshine the day I took this photo - I even parked the car and walked back to take a picture especially! - but I knew there was heavy rain coming, so it had to do.
But I'm sure you can imagine the intense gold colour of the leaves, contrasting with the grey flint stones of the wall in the sunshine. I'd seen this tree along the River Walk a few days earlier when the sun was out -
I can still remember when I joined the Cathedral and the office was at the back of a building with a long garden. There was always something to look at in the garden all year round but the day I started, there was a ginkgo in all it's autumn glory. It was hard to look away and get on with some work!
I didn't have a camera phone back then - although I bought one soon after and took loads of photos around the garden - so I took my camera in and captured this -
I took some lovely photos around the garden in the following two years but then we moved buildings, so I only got to see this view of the Ginkgo one more time. I should hunt those photos out and start sharing them again.
If you popped in last week you'll be glad to hear that the pat*tern for the Romsey Wrap in coming along nicely and should be ready soon.
Bye for now!! T xXx
Sunday, 18 November 2018
The Romsey Wrap
I've been absent from my little space for rather a long time again haven't I?... I haven't been sitting idly by any means - you'll find me making and posting very regularly over on Instagram (link in sidebar) and it occurred to me yesterday that what I need is an app that will copy each IG post and pop it into blogger for me! Does such a thing exist do you think??... Please let me know if it does!!
 Anyway, like I say, I bought 2 balls of yarn to make a scarf and initially I had planed on making my Tail of Two Dragons knitted scarf but before I even got home with those 2 balls, I'd seen something else that was hand dyed and lovely and bought that too, so that will become the knitted scarf. One day... So that meant something else for the autumn colours and I decided to do something new.
So anyway, I reckoned it was time I popped in and said hi and spent more than just 2 minutes here! So I thought this was the ideal place to properly share my latest creation - The Romsey Wrap.
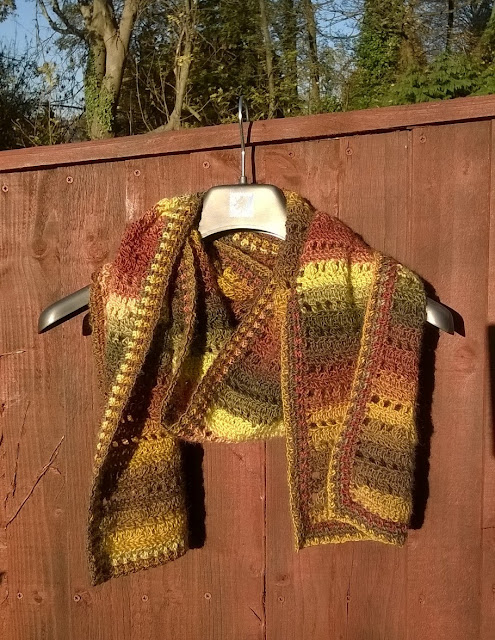
It's another scarf - they're just so quick to make aren't they - but once it was finished and I was thinking about a name, it occurred to me that actually, if I swapped the yarn for something finer and increased the number of stitches, it would also work as a lightweight shoulder wrap. Two for the price of one, that's my kind of pat*tern!!! And the name? Well, I made the first version with 2 balls of King Cole Riot DK in their colourway Beech, as I just can't get enough of the autumn colours this year, and I bought it in my favourite shop in Romsey. Hence the Romsey Wrap, in their honour. (It was nearly the Romsey Riot!...)
(By the way, haven't the autumn colours been simply AMAZING this year??? My only regret is that it has been so stupidly busy at work that I haven't been able to take my traditional autumn week off, to get out and enjoy all that colour. So I've had to make do with views out the car window on the way in, short lunchtime walks through the park and a quick visit to Hilliers last weekend. Not the same though...)
 Anyway, like I say, I bought 2 balls of yarn to make a scarf and initially I had planed on making my Tail of Two Dragons knitted scarf but before I even got home with those 2 balls, I'd seen something else that was hand dyed and lovely and bought that too, so that will become the knitted scarf. One day... So that meant something else for the autumn colours and I decided to do something new.
The textured pat*tern is reminiscent of my Popcorn Dreams crochet scarf but it's long and straight, with a simple edging. And as already mentioned, you can easily switch up your yarn for a completely different look.
The pattern came together so incredibly quickly that it virtually made itself! Writing it up is taking a lot longer - I have made a start but it isn't finished yet. No where near finished actually... But that doesn't mean I can't share a photo or two to whet your appetite!
The main body of the scarf is just 33 stitches wide and has a simple 5 row pattern repeat. The edging is even simpler and if you work a few rows it looks like moss stitch. It certainly finished it off nicely - to be honest, when I finished the main body and put it on, I looked in the mirror and couldn't believe how ugly it was!! I really wished I hadn't wasted my time and effort -not to mention the cost of the yarn...
I was so disappointed, I very nearly used the leftovers to make a basic hat but decided there wasn't quite enough left for that and this yarn is a bugger to unpick if I couldn't finish it. So I decided to use the remaining yarn to work a simple border instead and boy oh boy, did that border bring the whole thing together and bring it to life!!! I really can't believe how much difference it made. I hated the initial scarf so much I didn't even take a photo of it pre-border. But now? Yes, now it really works! And I can't wait to make the big, wrap version!! I think maybe silver-grey, lace weight alpaca, on a big hook.
Apart from making more scarves, I also can't wait to make an autumn colour blanket too but I want to put lots of colours in it and I know it will take time to collect together all the colours I'll need. I've been trying to take lots of inspirational photos when I have managed to get out, as it's surprising just what does make up an English autumn. There's an awful lot of green for a start from all the leaves that haven't changed colour, as well as those that are evergreen. There's a lot of lemony/greeny yellows and pinky tones, apricots and oranges, every shade of gold and bronze you can think of, as well as all the burgundy and reds that normally spring to mind.
I've decided I want to try and go for an English Autumn, not a New England autumn, on the whole. There will be burgundy and reds but I might go for a colourwash arrangement and keep them in one area. What I do know, is that it probably won't be striped like the scarf! It definitely needs to have all the colours mixed together.
But that blanket is a looooooooong way off yet. I'll let it roll around gently in my head for quite some time yet before I even begin to collect yarn.
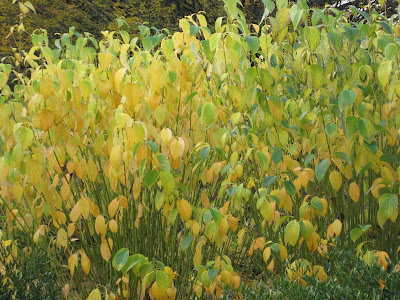
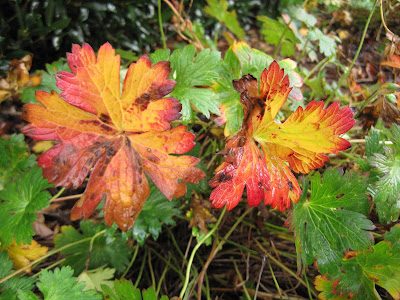
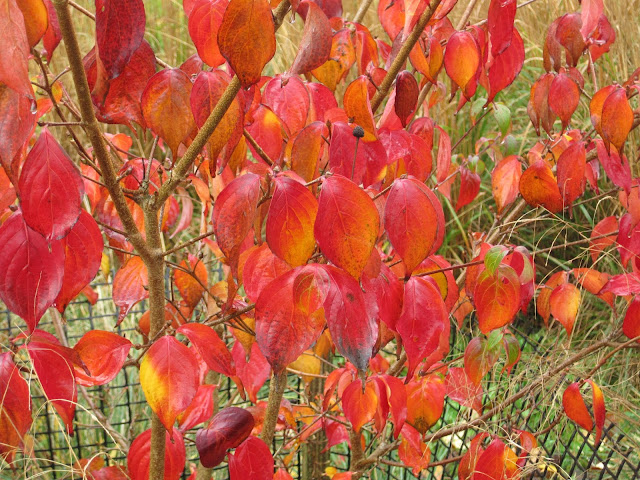
Would you like to see some of my inspiration to keep you (and me!) going until it materialises?? Yes, me too!! (These are not my best photos, just some of my recent snaps, with the first one being beech leaves.)
I've been trying to take lots of inspirational photos when I can and I'll put them all into an "autumn folder" to remind me of the colours I need to be using when the time comes.
Mind you, I've probably got thousands of autumn photos already to be honest!!
I'll try and remember to pop back and let you know when The Romsey Wrap Pat*tern is ready but please pop in to IG and say hi as I'm sure it will appear there first!!
And if you're wondering why I keep adding that * in the middle of a certain word, it's my vain attempt to keep the bots at bay. You know, those ones that trawl the internet just looking for pat*terns that they then take without asking and publi*sh for free on a website somewhere...
Lovely to pop in and chat with you, however briefly. Now it's back to writing up my very scrappy scarf notes!!
Take care, T xXx
Saturday, 29 September 2018
A Tail of two Dragons goes stripey!
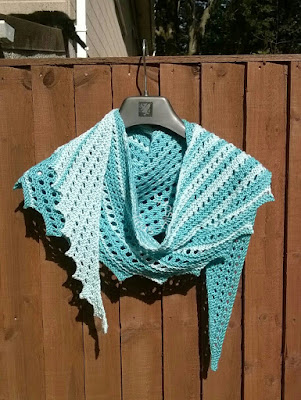
My Tail of two Dragons Scarf has been getting quite a bit of interest lately and it reminded me I always planned on making one with two colours.
(Click the link above, or in the side bar to hop across to Ravelry to buy the pattern.)
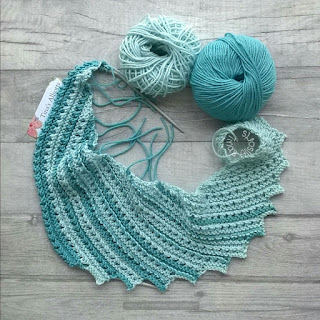
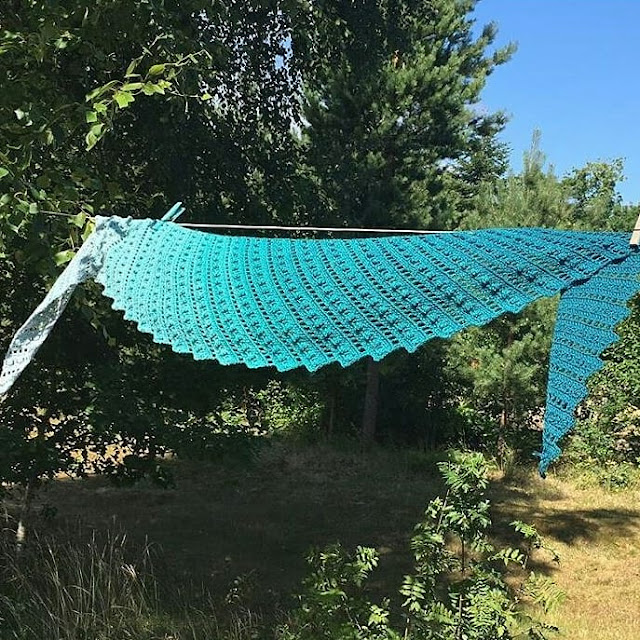
I'd bought some gorgeous balls of Debbie Bliss Baby Cashmerino in aqua and turquoise quite a while ago now as I knew as soon as I saw them they'd be perfect for it, I just hadn't had time to make it.
I decided to start with the lovely pale aqua and gradually merge into turquoise. Scroll down for lots of pics and my guide to the stripes.
(Did you see Fluffy photo bombing some of the pics??!! Look dead centre at the top of this last pic! I didn't notice him until I'd downloaded the pics and started cropping them and then fell about laughing!!)
Anyway, the stripes. As mentioned, I used 2 toning colours in a light and medium shade, although you could probably get a good effect from a more striking contrast of colours.
I made it exactly according to the pattern and had 240 rows when I cast off. If you are aiming for more or less rows, you will need to recalculate.
I began with the aqua yarn (colour 1) and worked the first 60 rows. Then I joined in the turquoise yarn (colour 2) and worked the next 2 rows, cut the yarn for colour 2 leaving an end and picked up colour 1 again. I didn't break off colour 1, I just carried it up the side of the work, "fairisle style" on each row end so I didn't get a loop. Once I reached the point where I needed to carry the yarn over 6 rows, I did break the yarn and joined it in again later. It made for a lot of ends to sew in but the neck edge was neater.
I continued like this, keeping the pattern correct and switching back and forth between the two colours, using the following sequence of stripes -
ROW No.
1 - 60 60 rows colour 1
61 2 rows colour 2
63 8 rows colour 1
71 2 rows colour 2
73 8 rows colour 1
81 2 rows colour 2
83 8 rows colour 1
91 4 rows colour 2
95 6 rows colour 1
101 4 rows colour 2
105 6 rows colour 1
111 4 rows colour 2
115 6 rows colour 1
121 4 rows colour 2
127 6 rows colour 1
133 8 rows colour 2
141 4 rows colour 1
(As the scarf has a textured pattern, you will have some rows of colour that make little bumps on the right side and some don't.)
Here's a link to my striped version on Ravelry - take a look if you want the exact yarn details etc.
and if you make your own, please do link your project as I'd love to see your version!!
(Click the link above, or in the side bar to hop across to Ravelry to buy the pattern.)
I'd bought some gorgeous balls of Debbie Bliss Baby Cashmerino in aqua and turquoise quite a while ago now as I knew as soon as I saw them they'd be perfect for it, I just hadn't had time to make it.
I decided to start with the lovely pale aqua and gradually merge into turquoise. Scroll down for lots of pics and my guide to the stripes.
Anyway, the stripes. As mentioned, I used 2 toning colours in a light and medium shade, although you could probably get a good effect from a more striking contrast of colours.
I made it exactly according to the pattern and had 240 rows when I cast off. If you are aiming for more or less rows, you will need to recalculate.
I began with the aqua yarn (colour 1) and worked the first 60 rows. Then I joined in the turquoise yarn (colour 2) and worked the next 2 rows, cut the yarn for colour 2 leaving an end and picked up colour 1 again. I didn't break off colour 1, I just carried it up the side of the work, "fairisle style" on each row end so I didn't get a loop. Once I reached the point where I needed to carry the yarn over 6 rows, I did break the yarn and joined it in again later. It made for a lot of ends to sew in but the neck edge was neater.
I continued like this, keeping the pattern correct and switching back and forth between the two colours, using the following sequence of stripes -
ROW No.
1 - 60 60 rows colour 1
61 2 rows colour 2
63 8 rows colour 1
71 2 rows colour 2
73 8 rows colour 1
81 2 rows colour 2
83 8 rows colour 1
91 4 rows colour 2
95 6 rows colour 1
101 4 rows colour 2
105 6 rows colour 1
111 4 rows colour 2
115 6 rows colour 1
121 4 rows colour 2
127 6 rows colour 1
133 8 rows colour 2
141 4 rows colour 1
145 8 rows colour 2
153 4 rows colour 1
153 4 rows colour 1
157 10 rows colour 2
167 4 rows colour 1
167 4 rows colour 1
171 10 rows colour 2
181 2 rows colour 1
181 2 rows colour 1
183 10 rows colour 2
193 2 rows colour 1
193 2 rows colour 1
195 12 rows colour 2
207 2 rows colour 1
209 - end continue with colour 2 only
207 2 rows colour 1
209 - end continue with colour 2 only
Here's a link to my striped version on Ravelry - take a look if you want the exact yarn details etc.
and if you make your own, please do link your project as I'd love to see your version!!
Happy Knitting!!
Thursday, 19 July 2018
Catching up!
So it's been a month since I popped in here - again.... I'm sure I've done loads in that time I could chat about, so I figured I'd just check back through my Instagram feed to see what I've been up to!
In reverse order, this is my current project - a baby blanket combining lovely big white daisies and a ripple pattern. It's called the Daisy Chain Blanket by Harlow Monroe Handmade and is available to buy from Ravelry.
There are so many different colour combos you could go for with this blanket but I went for duck-egg green, silver grey and white. It's only an acrylic/nylon yarn but is working up very soft. I don't have long to get it finished so need to get a move on really...

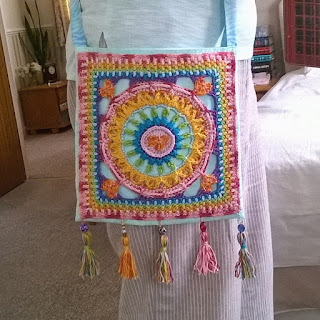
Prior to that was this very bright and colourful bag. It's a crochet square which was designed by Emily of the Loopy Stitch and then sold by Jane of Queen Bab's, to raise funds for a wheelchair and accessories for Jane. I decided to attach the square to the front of a very simple little bag on a long strap - just right for summer festivals!!
I took lots of photos along the way with the intention of writing a little tutorial of how to make your own bag. It will have it's own page when it's ready but it's not quite there yet. Isn't it a GORGEOUS square though?? I really enjoyed making it too.

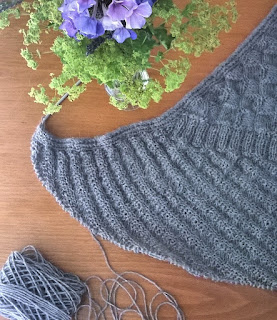
I'm also working on an asymmetric knitted shawl on and off, with the intention of writing up and selling the pat*tern. In the pic below it had started to go wrong though... I was using different textured stitches and tried a diagonal line - but the tension was so loose it really started to grow in width!! Needless to say, this section was frogged and something different has replaced it.
There's also an aran scarf in the process of writing and finalising. This also has several different textured patterns in it to make it really interesting not only to wear but also to make. All the stitch patterns are very simple though so that even an adventurous beginner could make it. Here I've used a wool & alpaca blend to make it the initial sample and it came out beautifully!
 I was delighted to manage to get one of the new ten pence pieces recently. Someone was going to the Royal Mint for a visit, so bought one in a presentation pack for me - and joy of joys, it's got a Tea Pot on it!!! How apt!! (See my Tea Cosie tab!!)
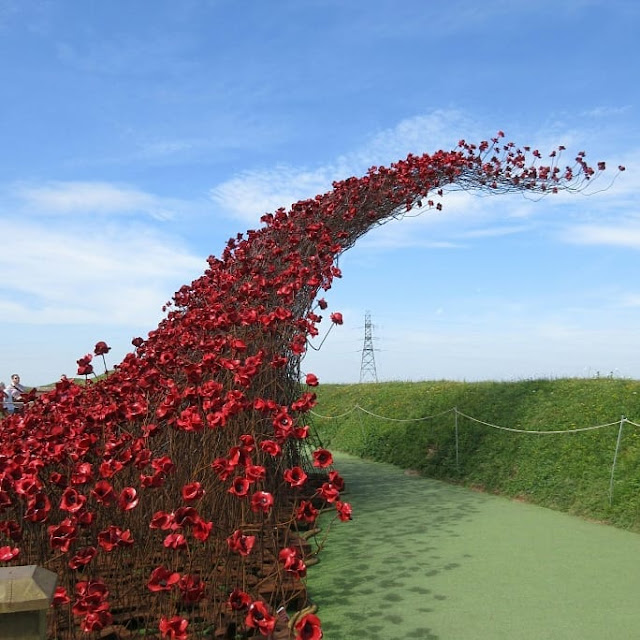
On a perhaps more solemn note, I managed to get to see the Poppy Wave display at Fort Nelson near Portsmouth, just before it closed. Oh my, what an absolute spectacle it was!! Quite stunning and a very moving tribute to those who fought and lost their lives in the First World War.
It had originally formed part of the display of poppies at the Tower of London in 2014 and has been touring the country - this was it's last stop before going on permanent display in Liverpool.
It was a beautiful morning and we popped down early, partly to be there before it got busy and partly as we had other things to do that day. I'm very glad we were there early as when we left around 11.30am, the queue looked to be at least 2 hours long!! It was definitely worth a 2 hour wait - but it was in the blazing sun...
 If you pop in here regularly, you will know that I designed a mixed stitch crochet blanket just over a year ago, which is available as a free pat*tern on Ravelry (see the separate tab at the top of the page). It had it's one year anniversary of being published last week - and look how many people have downloaded it in that year!! I hope at least 1% have actually used the pattern, rather than simply download it...
And I'll end today with my most recent finished and published pat*tern - my Popcorn Dreams Scarf. It felt like it took an age to design and make it, write it up, test it, get other people to test it as well.... But I got there eventually. All the versions below are by my testers and aren't they simply lovely?? If you'd like to see more images, then pop across to Instagram and search for the hashtag #popcorndreamsscarf .
This one is by Helen, aka Flora Honeypot.
This is by Jan.
And this one by Julie - and she dyed the yarn herself.
This lovely, slightly larger version is by Torun - it shows how easily you can adapt the pat*tern to suit the size you'd like.
And here's a little montage of pics - and none of them are my own!!

I'm off on my hols very soon, so won't be back here until August. Hope you're enjoying the unexpected heatwave we are still having here in the UK?! I'm really hoping it will last another 2 weeks!
Take care, T xXx
Subscribe to:
Comments (Atom)


