Believe it or not, I started writing this post more than 2 months ago..... where DID those 2 months go??
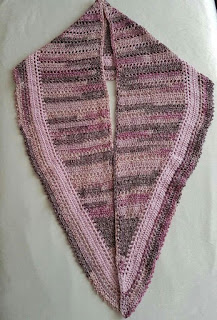
This was supposed to be a proper Ta-Dah post of my new design, the Looks Like Rain Scarf. But I'm so late finishing it that I have published another design since!
Ah well, I might as well write a few words about it now I'm here.

This design was born in the autumn last year but not quite finished. I got stuck over adding a proper traditional 2" pompom at each end - when the answer was actually to start the crocheted pompom trim right on the corner. It just took me 6 months to think of that and get it written! Originally it was going to be called Cirrus - but then I found that one of the 'big' designers had recently used that name herself.... so after a lot of thinking, I came up with Looks Like Rain. And that's when the hot weather broke and it began to rain...
This is one of my early pics of it -
I was a VERY lucky girl indeed - as soon as it was published, it got picked up by someone who runs a forum group for people who like making scarves and shawls and it got posted there. Hence, it got a lot of views and it even got into the top twenty most viewed ptterns on Ravelry - for about ten minutes!!
If you would like to take a look yourself, you'll find it
HERE.
During the final design process I had 6 fabulous ladies who tested the design for me prior to publishing and they did an amazing job! They all had their own ideas about what yarn to use - and how many colours to use - one lady even added tassels!
Just take a look (and you will find links to each lady right at the foot of this post too) -
(Liz of Bizzymits (the pics just above) put me to shame by very quickly writing her own amazing
blog post!!!! I really am out of practise at this.... Pop across and have a look at her blog for a read!!)
Having seen what my testers were doing with the pattern to add their own twist, I tried it with a very fine alpaca and silk blend and added beads along the edge instead of the pompoms. And, oh, those beads!! They looks so sophisticated!
But I was also keen to show what could be done if you only had one skein available, so made this next one. By simply adjusting the number of increases and then reducing the number of repeats to shorten the length, and finally, replacing the pompoms with a picot trim, I came up with this -
And I wish you could see the yarn in real life too as it is the most amazing hand dyed yarn. The colourway is called 'Demelza', by
Biff Sugar Yarns.
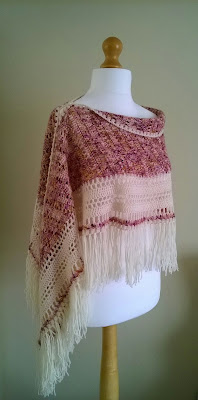
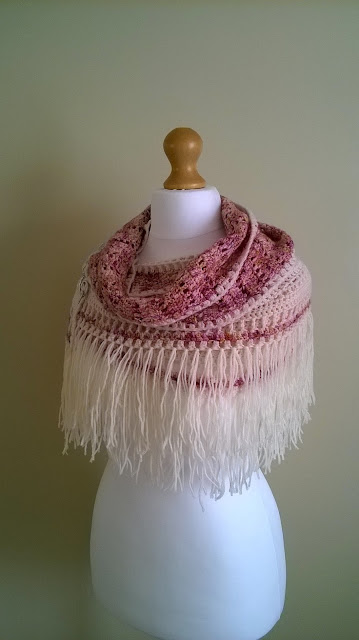
The I tried it with a hand dyed double knit merino yarn (unpicked from a previous unworn project), and inspired by my testers, I teamed it with a plain ivory for the border. Then added tassels!!
And how come I suddenly started taking pics with the assistance of a tailors dummy? Well, I finally looked into buying one and when I realised they were actually quite reasonably priced, I couldn't really hold off buying one any longer. Her name is Lottie - because she's going to live in the Loft when she isn't on a job!! And where did I set her up to take pics.... take a look!
As you can see from the heap on the corner of the sofa, I had to move a lot of (crafty) clutter out of the way first! But it worked quite well really.
Making this design gave me ideas for the next one. Which in turn, might well inspire a future design!! Although, to be honest, I really would like to write a 'written' version of my Tooty Stripey Blanket first. But that will take a lot of work, so may be a long way off...
If you're
really lucky, I might make it back before another 2 months have gone by... But then again, it might just be easier to follow me on
Instagram....
Here are some links to my testers instagram pages, so you can pop across and visit -

