Monday 27 June 2016

The Umbrella Bag Ta-Dah

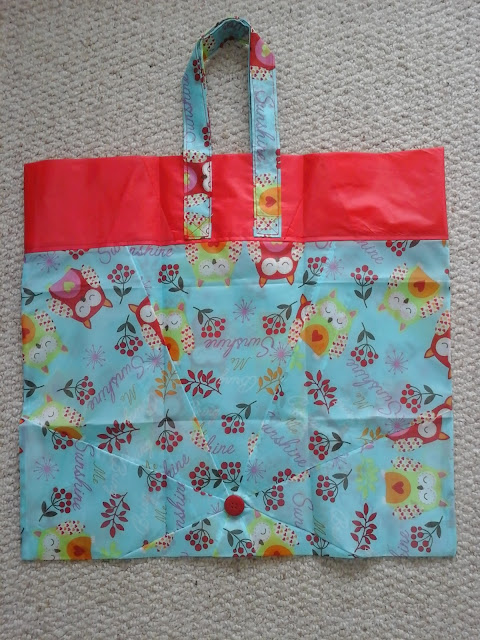
Introducing the Umbrella  Bag! No, not a bag to keep your umbrella in but a bag made from an umbrella.

Tina's Allsorts, the Umbrella Bag
Normally I would use a broken umbrella but as this is a gift, I bought a couple of new ones, albeit from poundland.
It's my friend's birthday today and her favourite colour is turquoise, so when I saw this turquoise umbrella I knew exactly what to give her. It has a lot of red in the owl print on it,so I got a plain red one too for contrast.
It's not the nicest quality umbrella fabric but what can you expect for the money?
Tina's Allsorts, the Umbrella Bag
First, remove the fabric carefully from the frame. I know I bought (really ) cheap ones but it was held together with tiny plastic tags - the sort used to attach price tags to clothes. It's no wonder it only takes one puff of wind to turn inside out!
Lay the fabric out and iron out the creases. I had the iron set to medium and the fabric didn't melt.

Decide on the size and shape of bag you want to make, and whether you want to make a feature of the centre of the fabric. The fabric is made up of triangular panels that meet in the centre and there is a small hole at the centre.
I did make a feature of this, as you'll see in the finished bag. I glued a contrast button over the centre hole. Check the seam on all the panels and make sure they're not going to come undone. Strengthen them with a line of machine stitching if you feel you need to.

Now make your bag...Apologies that I'm not writing you a nice little tutorial but I wanted to just get on with it and not keep taking photos. If you Really want one, just leave a comment and I might write one up over the coming weeks. And yes, I know the handles are close together. The fabric is so floppy that I know from experience to stitch the handles a woman's "hand width" apart.

Ta-Dah!!

Tina's Allsorts, the Umbrella Bag

Tina's Allsorts, the Umbrella Bag
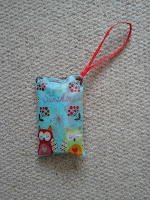
Not bad eh? There was enough fabric left to make a matching bag for it too. And see all those creases in the bag? They're deliberately ironed in to make it easier to fold it up neatly so it fits in it's little bag.

Umbrella fabric is ultra thin and light, holds a fold so it's easy to fold up and put away and is (usually ) really strong. Perfect for a medium sized shopping bag when you only need to buy a few bits. Although you could always use two umbrella and patch the fabric to make a larger bag.

I made a slightly smaller version from a striped umbrella a few years ago and often get comments on it. And as it's so thin and folds up so small, it easily fits in the pocket of my handbag, so I'm never without a bag!

Sunday 26 June 2016

All-sorts of things...

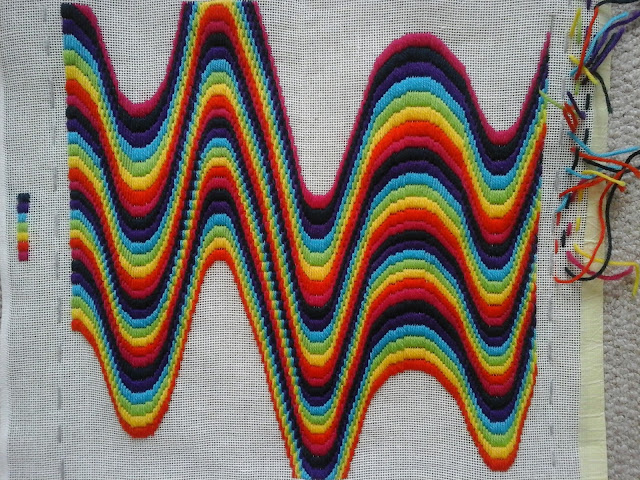
The bright bargello wave is coming along. The design area is 15" square and I've used 2 skeins each of 7 colours (DMC ) to get this far. I reckon there's about a third to go. The first set of 7 rows each cover 4 threads, the next set 5 threads, then 6 threads. I'll be almost at the edge by then and I don't know whether to go back to 5 threads, or go for 7. Got to get there first though! 

Tina's Allsorts, Bargello Wave


While putting a picture of the bargello wave on Facebook last weekend, I saw this gorgeous brooch by Fiona of Marmalade Rose. She makes the most fabulous pictures from felt that look so real, you have to look closely before you realise they're made from tufts of felt and machine embroidery. Amazing! Go take a look. My favourites are the mice.Anyway, I fell in love with her sheep brooch, so now she's mine and her name is Eunice. Get it? Ewe-nice..
One of my favourite blogs at the moment is by at Heather of The Patchwork  Heart. (Have I mentioned her before??) Last weekend she recommended this Mandala book. I had a look on amazon, ordered it and it was delivered within 24 hrs. Wow! And it's a really good book too. I quite enjoy making them but what the hell do you do with them?! I have some DMC Natura in cream and 2 shades of peach  somewhere. I might buy another colour or two and start making some - when I get time! They'd also look really good worked in the Sirdar Crochet Cotton I'm using at the moment - it's an absolute dream to work with! I'm so glad I chose it to make my summer cardigan. If we ever get a summer that is...

I mentioned very briefly last week that I was about to start casting on with a nice elastic foundation row. Well this is what that looks like. Never mind a line of chains and then work your first row into it. This cast on method produces a foundation and row one as one row. And it's nice and stretchy, unlike a chain cast on which (with my crochet) can be non-stretchy - not much good for clothes. Here's one link on how to do it, or just search online - there's lots of tutorials and videos out there.
In these two photos above you can see both sides of this foundation row. Th left hand photo has the "right side" on the right and the "wrong side" on the left. The right hand photo shows the bottom edge of the foundation row. See how it has 2 loops like a regular crochet stitch?? Perfect for working your edging into.
I had done a little test square and decided to work 210 stitches. This was quite clearly too many, so I re-measured and re-calculated and pulled out 20 stitches. Then I worked about 4 rows and measured again. Still too big... So I ripped it back and started again with 171 stitches. I think it's about right now. 
The waistcoat pattern I'm using starts just below the bust and works up to the shoulders, then you work from the bust to the hem in a lacey pattern. I decided to work a few rows of plain trebles at the bustline before going into the mesh pattern. Being a waistcoat pattern, the armholes may come in too far from the shoulder but I can fix that easily with a couple of rows of trebles. The colouring in the yarn is so busy, it should blend in easily. 

Tina's Allsorts,crochet cardigan

Not sure whether to do some more of this today, or get on with the bargello. Depends on where the cat is really, as she has now discovered the joy of playing with wool... I wouldn't mind so much but she's not even ours. Not that you'd know it as she certainly makes herself at home!!


I do have a little something else to show you but as it's a birthday gift that won't be given until tomorrow, it will have to wait another day. See you then!


Saturday 18 June 2016

Ooh, that's bright!


My 2nd bargello cushion cover is coming along nicely. To be honest I haven't done very much of it this week. And I have yet to take a photo that shows the colours as they really are. But they're bright!
It's growing quick enough though. But it's really annoying when you get to the end of a length of yarn with 4 stitches to go...
And I'm mulling over what I can make to use up the left over lavender/green wool. A little zipped pouch? A scissor keeper? What do you think? Any ideas??
Tina's Allsorts, Bargello Wave
In amongst my bargelloing  this week (okay,  I know that's not a real word!) I've been hunting for a crochet cardigan pattern but every sample I've worked up, although it comes out okay, you can't really see the stitch pattern because the variegated yarn changes colour so fast it really draws your eye away from the pattern. This is the sample from the Chinese pattern I liked. Stretched out on my black trousers it looks good but without the black, you really can't see it, so why go to all the effort to work what is a somewhat complicated pattern.

Soooo... I thought what about this pattern? I used it to make a gorgeous waistcoat a couple of years ago. It's a 4ply pattern and I'm using DK so I've done a little sample to check the tension and work out which size I'll need to make. I'll adjust the neckline into a scoop neck, plus add sleeves of course. And keep my fingers crossed it comes out okay...
I've set up a project page on Ravelry to keep track of the adjustments I'll make etc.

Just got to get cracking now! Right, cast on 210 stitches with an elastic foundation row...


Sunday 12 June 2016

Bargello Ta-dah

The first bargello cushion panel is done!

Tina's Allsorts, Lavender Bargello

It still needs to be blocked to shape but all the stitching is done.
When I took it into work last week we were all in agreement that it actually looks more like lavender fields rather than drifts of bluebells. But I don't mind. I like lavender too.
It didn't take as much wool as I expected. I started with 2 skeins of each of the eight colours and had to go back for a third of each, although for 2 colours I only needed the extra to complete one row! So there's enough left to make a little something extra. I'll have a chat with Lyn about that tomorrow.
Oh - and a word of warning about not picking up enough tapestry wool to complete your project when you initially choose your colours. If you go back for more and inadvertently pick up a different dye lot, they can vary. A lot! The Anchor wool that I used is lovely to work with but doesn't have dye lot numbers. DMC is nowhere near as nice to work with but does have dye lots. Just saying.

The other girls have been making some lovely pieces in fine mesh canvas with embroidery threads. They all looked stunning and completely put mine in the shade really...

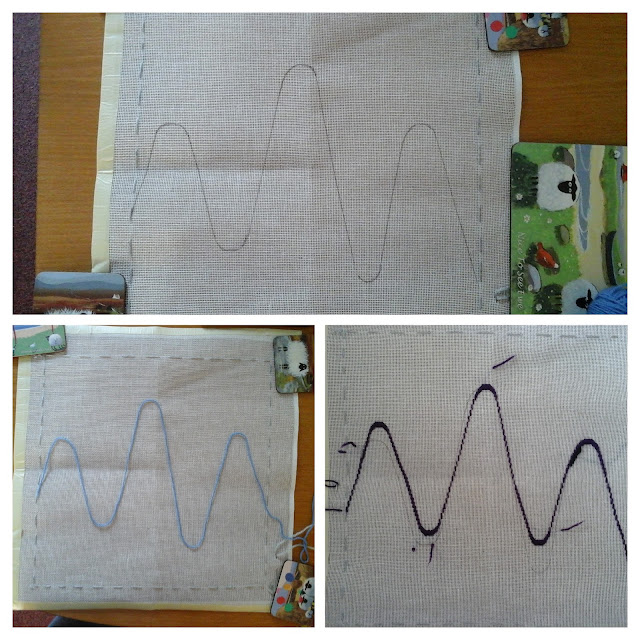
Lynn had the next panel cut ready for me and had chosen some Very bright colours! She wanted some dramatic peaks and troughs, so firstly I "sketched" with wool, then put in pencil lines. I stitched the first row and kept going back to look as I wasn't completely happy.

Tina's Allsorts, Bargello Wave

 I wasn't sure about having all the peaks and troughs being so tall, so unpicked one of them and drew it again with a much more shallow curve.

Tina's Allsorts, Bargello Wave

Here are the colours Lynn chose - a very bright rainbow. To start with, for the first set of colours, I'll do every row covering 4 threads. The next set will cover 5, then maybe 6 and so on.
Hopefully, that should give quite a psychedelic effect. Maybe!

This is all I've done so far - I've spent Far too much time on Pinterest this week. It's rather addictive!

Tina's Allsorts, Fimo Crochet Hook Handles
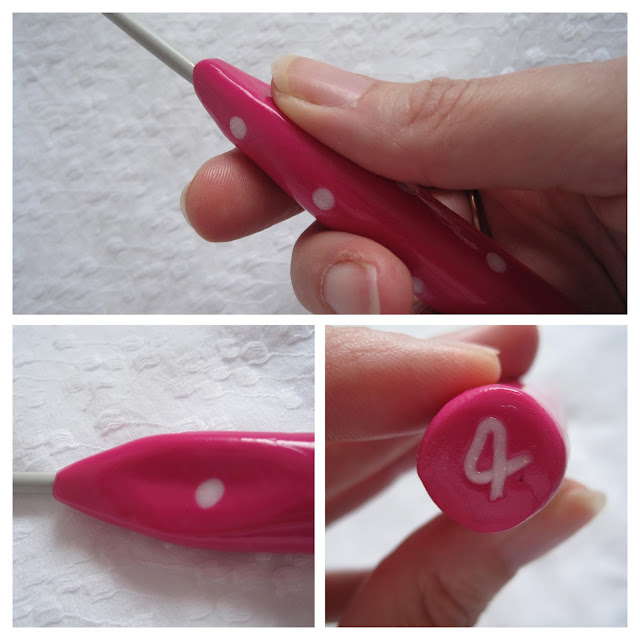
I have also made a Fimo crochet hook handle in pink this week, ready to make my crochet cardigan. There's something quite satisfying about using a hook that matches the wool! And naturally, it needed a little matching cover made using the cotton yarn I've bought...

I saw these hooks on Pinterest - where else?... - four or five years ago and straight away had a go at making my own. Here's the LINK. They are so much more comfortable to use than just a metal hook. Indeed, all the hooks I actually use now have a hand made handle, all in different colours - often to match a project!

Tina's Allsorts, Fimo Crochet Hook Handles

I haven't actually started the cardigan though. In this photo, you can see the test piece in the Chinese pattern I'd found  (on Pinterest ) but you can't really see the pattern because the yarn is variegated. And it's complicated enough that you need to concentrate on it, so with all that work I want it to be visible! So I'm now rethinking.

Naturally, that may involve a little searching on Pinterest...

Till next time!

Saturday 4 June 2016

Bargello Sample Piece


Sooooo... what's the new project?? Well, it's something for Lyn, the manager at the craft shop. Recently a customer asked us if we had heard of barcello. I thought she probably meant bargello and sent her off to have a chat with Lyn who is the Oracle of the crafting world and knows how to do everything!
Anyway, the customer came back looking very pleased to have found someone who had not only heard of bargello but knew how to do it. She'd seen something about it long ago and had wanted to try it but couldn't find anyone who knew what it was. She went away with canvas, wool and a big smile!!
I had tried bargello embroidery about 25 years ago (also known as florentine embroidery) and made a cover with a flame pattern for a small cushion. (I still have it somewhere at the back of the wardrobe I think.) Anyway, whilst it was an enjoyable - and quick - craft, it used a lot of tapestry wool and at the time I couldn't afford it. I returned to a variation of it some time later when I got into patchwork and quilting as there are loads of books on bargello quilts but I hadn't realised there are none currently on bargello embroidery. Thinking about it now, I realise it's not a craft I have seen anywhere for a very very long time. If you Google bargello embroidery and click images, you'll see a screen like this image pop up.

But the Oracle not only knew all about it but had started writing a book on it. By chance, the publisher had chased her up recently, so she's back to working on it. Consequently, she's got some of us working on sample pieces for her book. Last week she was working on a little bookmark and got one of the others going on one too. Whilst I wanted to join in, I was wearing the wrong glasses to be able to see the small gauge canvas they were working on. She offered to find me something to make on a larger canvas with wool rather than embroidery thread but warned me it was addictive as it grew so fast, and I wouldn't want to put it down. At the time I was still trying to finish the Springtime Baby Blanket, so said I'd wait til that was done first. Before the week was out though, I was back asking if she'd decided what I could make!!

She told me to go and choose some tapestry wool, while she cut a piece of canvas. I came back with a selection of mauves and green, thinking they looked like the colours of the bluebell wood I had visited last month.
She sent me back for a couple more colours as I'd need 5 shades of mauve and 3 of green. In the meantime, she had drawn a nice curved line across the canvas and said she wanted me to do a slight variation on true bargello. Normally, you decide how many threads your stitches will cover, be it 4, 5, 6 etc, and every stitch on every row of the canvas will have the same number of stitches. However, she said she wanted me to do a different number of stitches on each row, so that sometimes you would have a narrow band of pale mauve and sometimes a wider band etc. Hopefully, this would have the effect of looking like drifts of bluebells.
She  gave me a 20" square of canvas and 2 skeins of each colour to take home and I made a start the next day. I did email her a photo after the first couple of rows to make sure I was doing it right as it used a lot of wool on the back of the canvas and I wasn't sure if it should. (You can see in this photo, I tried it 2 ways, and one version just made a tiny sideways stitch on the back, and the other gives a complete vertical stitch.)
The answer came back, yes, vertical stitches on the back and it uses a lot of wool - see you on Wednesday for some more! She wasn't kidding either - I'm probably 2/3 through now and 2 skeins of each colour won't be enough to finish. Now I understand why the kits are so expensive...
And it is quite addictive! The curve she drew runs roughly diagonally across the canvas. so obviously there comes a point when the rows get shorter and shorter as you approach the corner and because they're then quicker to work, you want to rush on to the next row! Sometimes I turn it round and work towards the opposite corner.


I've tried and tried to get a picture that shows the true colours of the wools I'm using and the one above is probably the closest - I went outside to take it. And below is where it's got to so far. I think I'll work right into the corner, then finish the other half. When I've picked up some more wool that is!


This little collage of 3 pictures show how it's grown. You can sort of see how some rows are wider than others. The stitches  vary between covering 3 threads, up to 8. I didn't want to do them any wider really as I was worried about them being "caught" and pulled once it's made up into a cushion cover. I shall seek Lyn's advice on that on Monday.
It's quite a soothing craft to work on really. Once you've done the first row to set the pattern, you know that every row afterwards will be the same, so there's very little thinking involved. I'm sort of hoping she will have something else for me to make too - maybe a bit more complicated. A nice flame pattern, or latticework perhaps??

Naturally, there is a little something on the back burner crochet wise. I want to make a three quarter sleeve, lacy summer cardigan. Something that will give a splash of colour rather than provide warmth. I've been looking round for patterns and yarn and saw something I liked on Pinterest but there was only a chart (in one size) written in Chinese. I've found some other patterns to give me a good idea of sizing, stitch count, shapings etc, so will be having a go at making it up as I go along I think. My preferred method of working!!
My chosen yarn is Sirdar Cotton Prints DK in a lovely variegated pink. I'm never sure about crocheting with variegated yarn, so I'll make a tension square and see what it's like. I hope it will work ok though as it's a luscious colour - indeed, it's name is Coraliscious! Maybe next time, there'll be something ready to show you?... Take care, and thanks for reading.