Sunday, 28 August 2016

Peacock Tail Bag CAL part 2

Part 2 of the Peacock Tail Bag CAL was released on Wednesday and I think I spent quite a lot of yesterday working on it!! I've even joined the facebook group to see what other people are doing.

Here's a link to Tatsiana's Ravelry pattern, and her blog pattern link (scroll right down for the pattern itself). And video tutorials by Esther of It's all in a Nutshell.

The original set of yarns that I bought included gold. I may still use it but I'm not sure. As with any project where you haven't properly planned your colours and you're "making do" with what you have, there was a bit of unpicking and re-working.
I wasn't completely happy with how it was looking after part one. The pastel colours looked very muddy and the 2 bright colours looked just too bright. Then I decided to add another colour - the variegated pink that I'm using for my crochet cardigan. (Let's face it - that thing's never going to be finished...)
It's from the same range, so is exactly the same thickness and starts with the pale pink I'm using, then progresses to deep fuchsia. It made such a huge difference, that I completely started the back again and made it using the same colours as the front, when I had planned on putting them in a different order. I may not use the gold at all but if I do, it won't appear until I get toward the outer edges of the bag. I wonder if it's available in a variegated version?...

I think I've got the shapings just about right. It's a slightly complicated pattern that you need to read very carefully before you start each row and the video tutorials certainly helped. Indeed, it was while watching the video for part 2 that I realised I've done my bobbles completely wrong. But I kind of like them the way they are, so they're staying!!

Want to see??...

Tina's Allsorts, Peacock Tail Bag CAL

Tina's Allsorts, Peacock Tail Bag CAL


Tina's Allsorts, Peacock Tail Bag CAL

Tina's Allsorts, Peacock Tail Bag CAL

Originally I had thought I might do the back patterned as well, when it's supposed to be just stripes but having read the guidelines, Tatsiana warns that you might run out of some colours if you don't work to the same tension as the pattern. And as overlay crochet (that's what this type of crochet is called) uses a lot more yarn and I bought my colours in the sale, I'd probably run out at some point. So...I've decided for the back, rather than just the stripes in the pattern, I'd at least add in some "posts" - you see those long stitches that lay over the top of another colour and point towards the centre. Or lead away from it, depending on your viewpoint. What do you think?? Is it looking ok so far??
And I've already started doing tours of the charity shops for a cheap handbag with just the right strap! The whole CAL lasts seven weeks. Six parts for the actual crochet and the final part is making and attaching a fabric lining. But will I still like it when it's finished?....

Enjoy the (damp) bank holiday! T x

PS The Bargello Alliums is progressing nicely and now has dark green in all the little spaces. Photos next time.


Saturday, 20 August 2016

It's Lily time ! (and PeacockTailBagCAL part 1)

It's that time of year when my favourite lily springs into flower! It's in a completely different position in the garden this year and it certainly seems to like it. It gets much more sun, so the stems are much more upright this year. Normally they are long and curved downwards.
The buds developed very slowly at first, then when the weather finally warmed up, they fattened up very fast! I suddenly noticed a couple of days ago that the first one had opened, closely followed by half a dozen more. I was up early today and could see a few more just opening, so nipped up the garden and cut them.
I like to display them in champagne glasses - fill with water and stretch a small square of clingfilm over the top, then make 3 tiny holes and push the stems through. Gorgeous! And they have an amazing soft sweet vanilla fragrance. Just watch out for the bright orange pollen!


I've had this same (large) pot full for a good ten years now and they just keep going. I've re-potted them 2 or 3 times over the years to refresh the soil and give them a feed now and then when watering. Oh, and I do spray regularly in the spring to protect from lily beetle! 
If you want to grow your own, it's called Lillium Speciosum Rubrum. Readily available from good garden centres and online.

Part of the reason I was actually up early today was to crack on with the CAL bag project I'm joining in with. The first part was released on Wednesday and I made it last night just in one colour to check the tension. I took a quick photo this morning -  although I didn't actually need the help that was offered! 
Now I need to do it in my chosen colours. And it dawned on me earlier that as it's a bag that's going to be lined, I won't have to stitch the ends in!

Tina's Allsorts

Got to wait until next Wednesday for part two. ..

I've been working on the Bargello Alliums this week too. Lyn in the shop really liked it and is quite happy for me to work on it at work. Although I may well lose count and have to keep unpicking...

Tina's Allsorts, Bargello Alliums
Tina's Allsorts, Bargello Alliums 

 In the picture on the left, I used my darkest colour to work 2 rows just below the top of the flower. But there just wasn't enough contrast - the darkest colour came out looking almost the same as the colour around it. So I tried using a scrap of the deep plum from the bargello flame panel and it looked a lot better. I found a colour as close to it as possible in the DMC range and replaced the top of the 2 dark rows with it. As you can see in the picture on the right, it looks much better!!

I've done the bottom row (apart from the very edges that I'll fill in later) and started on the second. I had thought I might use a peachy colour for the little spaces between the flowers but Lyn suggested using a dark green instead. I used a bit of the darkest green leftover from the lavender/bluebell panel and she's quite right. I'll look for a really dark green on Monday. Want to see the whole row? ...

Tina's Allsorts, Bargello Alliums


CAL update - here's my first attempt in "colour". I'll do another later in a different combination to bring in the yellow as well. (And yes, it is supposed to look flattened across the top - that's part of the bag shaping.)


Till next time!! T x

Saturday, 13 August 2016

Bargello Ta-da !

The Bargello Flame cushion panel is finished! I think I like it. I might have done some of the segments on a different angle maybe but the colours certainly work together. Have a look. ..

Tina's Allsorts, Bargello Flame cushion panel

And some close ups of course!

Tina's Allsorts, Bargello Flame cushion panel

Tina's Allsorts, Bargello Flame cushion panel

Tina's Allsorts, Bargello Flame cushion panel
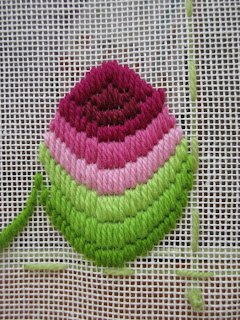
I've already started the next one. In hot pink and lime green. I've wanted to use those colours together for a while now and I kept wondering what design might look best. I wanted a repeating pattern rather than just curves or spikes, then I took this photo at Hampton Court and I knew what I wanted to do.

Tina's Allsorts

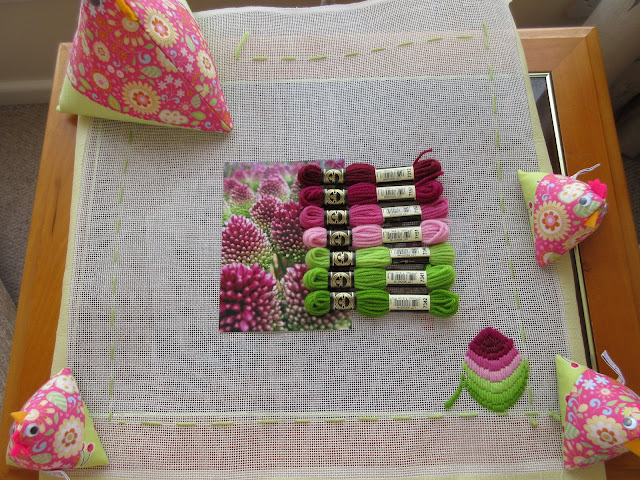
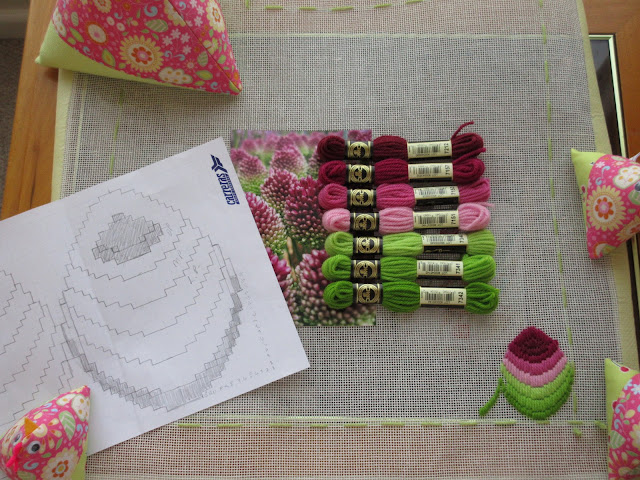
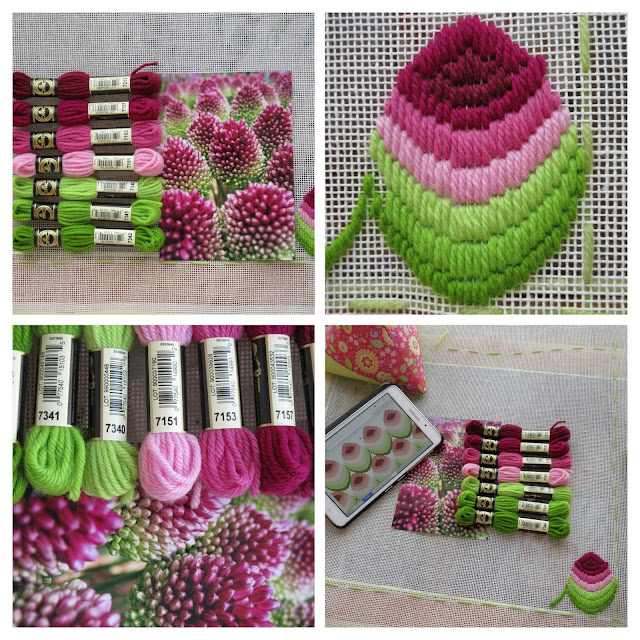
I took the photo to work with me last week to choose the tapestry wool for it - I had to go with DMC to get the shades to match the photo. Then I spent HOURS working out the chart. I even (very slowly) keyed it onto a spreadsheet so I could play around with it and get the pattern repeat right. 
I stitched the first allium last night - by the time I started on the pink I'd had to put the light on. That changed the colours and I wasn't sure if it would work. But another look this morning and they certainly do work! 
 Want to see?

Tina's Allsorts, Bargello Allium cushion panel

Tina's Allsorts, Bargello Allium cushion panel

Tina's Allsorts, Bargello Allium cushion panel

Tina's Allsorts, Bargello Allium cushion panel

I think it's going to be a labour of love with a lot of counting involved, so probably not a good project to take to work. That means it could take some time. .. So when I stitched the first allium I actually measured the length of yarn I used for each row. From that I was able to calculate how many skeins of each colour I'll need so I can make sure I buy enough now,with maybe a little extra.
I haven't decided what colour to do the little gaps between the flowers. I might wait until I've done a few and try different colours and see what works best.
But so far I'm very happy with it. And as you can see, I also enjoyed the little photo shoot!

I've been so busy with it this week that I haven't even touched the crochet cardigan. Not even thought about it. It may not get finished if I'm completely honest... which would be a shame as I've put a lot of effort into it. But I'm not in love with it anymore.
And next week of course,the CAL bag starts so that will keep me occupied.

What about you? What are you up to? I'd love to hear.
Have a good week.  :-)

Sunday, 7 August 2016

Bolero Ta-dah

Sorry it's been a while. I had a lovely weeks holiday of days out with good friends and family, then a busy week at work,with an extra day in the shop, so no time to blog.

At the start of my time off, I got a shift on with the purple bolero so I could wear it while the weather was hot - boy was it hot that week! It turned out very well, made using my favourite pattern - the make it up as you go along pattern! It has trebles, granny clusters, a chain stitch bust dart,picot edging and a beaded hemline. It fits like a dream and looks fab with my sundress. 

Tina's Allsorts Bolero

Tina's Allsorts Bolero
The crochet cardigan is not going so well now. I think I've gone off it to be honest. It might become a waistcoat rather than a cardigan. We'll see.

The latest bargello flame panel is nearly done. I'll do some more tonight and probably finish it at work tomorrow. And if you're wondering what all the bits of wool on the left hand side are for - they're just long enough to work 2 or 3 stitches at the end of a row but too long to throw away. Wool isn't cheap you know.  Each panel would have cost me over £30 a time to make if I were buying the materials myself. By the time you add in the backing and a cushion pad it will be £40 per cushion...

Tina's Allsorts Flame Bargello

I know what I want to do next - in hot pink and lime green. If I'm allowed! And if we have enough lime green in stock. Watch this space on that one. 

Do you ever look at my photos and wonder what camera I used to take them? Most are with a Canon Ixus 95, some on my (very old) Sony Cybershot phone and the odd one on my tablet. But I had to buy a new camera recently. I think I wore out the buttons on my beloved Ixus 95 as they suddenly started sticking. So I now have an Ixus 285. In purple! I'm still getting the hang of it. And as it has 20m pixels I'm going to have to buy a much bigger memory card and possibly  a spare battery. I chose this one partly because it can connect to my tablet by wifi and then I can just download the odd one or two. The rest can go on the laptop.
I tried out the zoom on a butterfly and it came out rather well. What do you think?

Tina's Allsorts


Tina's Allsorts


Isn't this cosmos flower just perfect too?

Going back to crochet - whilst surfing the other day I came across a CAL that I thought I might join in with. That's a Crochet A Long to you and me. CAL. It's by the same lady who designed the Sophies Universe pattern I used for Emma's cushion.  I had just bought some more crochet cotton in the sale when I saw  it and the word serendipity came to mind. What do you think of my colours? Do they make you think peacock? Sort of? In a soft, pastel kind of way? Maybe.


I've never really done a CAL before. It will take 6 weeks to make, with very detailed instructions released weekly. I get the feeling I will be champing at the bit to get on with it!! 6 weeks will feel so long I'm sure. I'm quite looking forward to joining in and sharing my progress though. I wonder what colours other people will choose?...
Talk again soon I hope!! T xXx