It's taken me a few days but here it is at last - how I lined my Peacock Tail Bag, and added a recessed zip. (That is, a zip that will sit at the base of the band, out of sight, rather than at the very top of the opening.)
I made sure I took plenty of photos whilst making the lining for my bag. I know Tatsiana has already done her own excellent tutorial but I just couldn't resist doing one myself. It's mostly photos (and I have resized them as there were so many!) with basic text, so I hope it makes sense. Here goes.
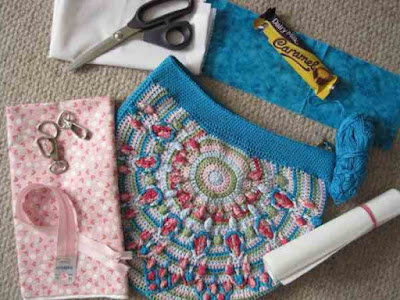
Firstly, gather everything you need.
I found a very small piece of turquoise fabric in my old patchwork stash that exactly matches the yarn to line the band. Then there's the pink lining fabric and zip. Iron on interfacing. Stiff interfacing for the band. D rings and bag clips. And chocolate!
I laid the bag on the iron on interfacing and cut round it, allowing a small seam allowance. The "nicks" at the bottom will add a little shaping later. Here's a close up -
I'm using a muslin type interfacing. Never tried it before but thought it might add a little body to the fabric, plus someone on Facebook suggested interfacing the whole of the lining,not just the band, to make it more durable. Iron it really firmly onto the wrong side of the pink fabric, then cut out.
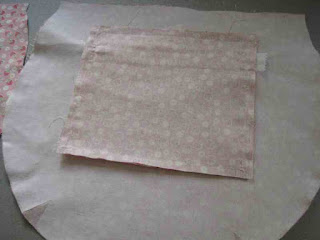
Make a slip pocket to go on one half of the lining. Decide what size pocket you want and cut one in pink fabric and one in any other fabric. Stitch all the way round leaving a small opening to turn through.
Carefully push out the corners after turning through and press. Pin in place and stitch to the bag on 3 sides, leaving the top open. If you want to, add a line of vertical stitching to make two pockets rather than one big one.
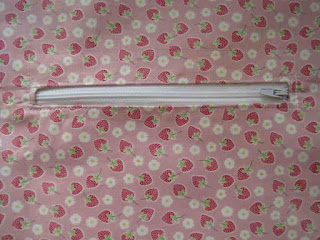
Now I must apologise here... It's been so long since I fitted a zipped pocket, I had to cobble it together. So I'm sorry but I'm going to say "now insert a zipped pocket". But not tell you how... Sorry. There are loads of tutorials online that will tell you how. This is how mine looked after a bit of cobbling!!
When I put the lining into the bag, I want this zipped pocket to be against the "back side" of the bag.
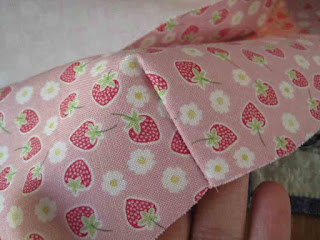
Now stitch those little dart shapes on both pieces, then pin the front and back right sides together, matching the darts and stitch round the curved edge, leaving the top 2 or 3 inches open so you can attach the top band easily later.
Can you see how those darts give a rounded bottom to the bag lining?
Lay your bag on top of the lining to see if you need to adjust the shaping maybe. I clearly needed to.
Don't forget to eat some chocolate now and then to keep you going. (I haven't had one of these for years. They're not the same anymore...)
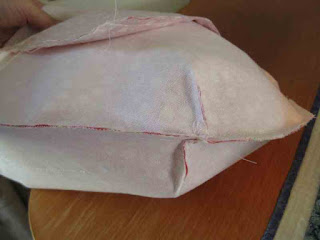
Fold the top edge over and slip the lining into your bag and try it for size. Looks ok so far.
Now prepare the top band. Tatiana cut hers on a curve but I had such a very small scrap of fabric (in just the right colour) that I had to cut it straight then make a tiny dart in the middle to give a little shaping. It would look better if cut on a curve.
Add a layer of the iron on interfacing but start a quarter inch down from the top edge. Cut a piece of stiff sew-in interfacing that is double the height of the iron on interfacing but a little narrower - you don't want to catch it in the side seam as it will be too bulky. Fold this in half and stitch it to the band lining along the top edge of the iron on interfacing. Turn down the fabric to the wrong side and press firmly. Did that make sense??
Turn the lining right side out and lay one of the band linings right side down, on top. Stitch through this layer with a narrow seam, keeping the stiff interfacing free. Turn over and repeat on the other side. Press this seam up, then let the stiff interfacing drop down to cover it. Now stitch the top of the side seams (you left them open earlier), then turn through and press again.
Make a cup of coffee and eat some more chocolate!
Turn it through again (sorry!) and pop it in your bag - shake it about a bit to get it just so. It should look like this.
Now make the D ring loops. Cut 2 pieces of lining fabric, fold the edges into the middle, then fold in half again and press. Put it through the D ring, fold in half and stitch to hold it together.
Line it up with the side of the bag and stitch firmly in place through all the layers of the bag lining and stiffening. I forgot to take a photo, so the one above has the zip inserted as well.
(If you want to, you can still crochet 2 pieces and slip stitch them in place later to cover the fabric.)
If you're not going to add a zip, you can skip ahead and stitch the lining into the bag now.
Otherwise, prepare your zip.
Lay your bag flat and measure the width. (I bought a zip which was that measurement plus at least 2 inches.) Cut two pieces of lining fabric to cover the zip. Fold over all four edges and press. Make sure your folds are absolutely straight.
Enfold the zip in this piece of fabric and stitch close to the zip teeth, trimming the "head end" of the zip and pushing it in to cover it as below.
Make sure you leave the "foot end" free.
Now, I forgot to take a photo as I did it but you need to cut a little piece of fabric, fold in all the edges, fold in half and cover the zip foot end. Trim the very end of the zip fabric first. It should look like this -
Now you're going to place the zip centrally on the band lining - I opted to insert it in the same direction as the zip on the pocket. Put it a quarter inch up from the join with the main fabric but parallel to the top edge. (Remember, the lining is still not stitched into the bag.)
Pin it in place, then stitch close to the top edge of the zip, making sure you stitch through the stiff interfacing as well. Do Not turn and stitch parallel to the side seam!
Turn the bag lining through and close the zip to make it easier to line up and pin the other side of the zip, then stitch. You see that gap between the end of the zip and the side of the bag in the photo above?? That's very important. Make sure you leave a gap. If you want to be precise, measure the full width of your zip (with fabric added) - the gap needs to be half this width, plus a tiny bit.
Here you can see the bottom edge of the zipped stitched in place and the top edge pinned ready. And that gap at the end of the zip? It helps the sides of your bag form a gusset shape.
Ooh, I've just remembered that I meant to say that I learned a new crochet stitch this week!! Woo Hoo!! Can you see that textured edge??? That's crab stitch. I've tried to do it before but just couldn't make sense of the written instructions I'd seen.
I saw someone else's bag on facebook and they'd done a crab stitch edge which looked really good, so I found a you tube video by Moogly of how to do it and OMG - not only was it dead simple but it looks FAB!!
Ok. Back to the sewing. Once you've stitched both edges of the zip, give everything a final press and then insert the lining back into your bag (with the right side facing in of course). Line up the D rings with the side seam on the bag and pin the lining a fraction below the top edge.
Now STOP here and think. Which shoulder will I carry the bag on? Where do I want the head of the zip to be when it's zipped up?? Hold the bag against you and make sure you've got everything the right way round. No?? Then turn the lining around and pin again. So much simpler than stitching, getting it wrong and unpicking...
Here you can see the back of the bag towards you, with the open end (or head end) of the zip to the left, pinned ready to stitch. Working from the right side (that's the crochet side), work a very straight row of stitches along the bottom of that top row of crochet (crab) stitches. If this were patchwork, you would "stitch in the ditch", so the stitched line isn't obvious on the right side. (I haven't taken a photo of that. Sorry.)
You see the end of the zipper stuck up here? If you don't like it, you can push it inside so it doesn't show.
And if you decide you don't want it zipped up all the time, then unzip completely and the zipper will hang freely inside the bag like this -
And that's it!! Apart from the strap of course. I still need to make the strap.... maybe this weekend. Maybe!!
I hope you've managed to follow what I did and apologies again that I chickened out of showing you how to insert a zipped pocket! I must look for a good tutorial and give you a link to it.
(And if I made any mistakes, please point them out so I can correct them.)
UPDATE : The strap is now completed. I crocheted it and backed it with the pink fabric, with a little stiffening added,then finished it off with a slidey buckle to make it adjustable.
Oh yes and it's FOR SALE! Pop across to FOLKSY for details.
(If you're interested but not in the UK, then email me and I'll get a price for postage.)






No comments:
Post a Comment